

Why You Should Use Cloudflare with Webflow: A Complete Integration Guide (DNS, Subdomains, and CDN)

When publishing a site on Webflow, you may have wondered if you should also set up Cloudflare. Since Webflow comes with built-in hosting, SSL, and a CDN, Cloudflare might seem like an optional tool reserved for advanced users. In reality, however, once you start operating with a custom domain, it is becoming increasingly difficult to ignore the benefits of Cloudflare.
This is because integrating Webflow with Cloudflare is not some unofficial workaround, but a configuration officially supported by both companies. Webflow’s officialCloudflare integration pageexplains that you can add DNS management, security layers, and edge-side server processing to your Webflow site using Cloudflare, andofficial instructions for connecting a Cloudflare domain to Webfloware also provided. Cloudflare also offersan official guide for Webflowthat explains a configuration known as "Orange-to-Orange" (O2O). In this article, based on this official information and Booost's practical experience, we will break down why you should use Cloudflare with Webflow, how to set it up, and common pitfalls to avoid.
Why use Cloudflare with a Webflow site?
You can publish a site perfectly well using Webflow alone. However, there are three main reasons why it is worth combining it with Cloudflare. First, it allows you to centralize your DNS management. While Webflow'scustom domain connectionrequires you to correctly configure A records, CNAMEs, and TXT records, managing your DNS through Cloudflare lets you handle not only Webflow-specific records but also email, authentication TXT records, subdomains, and verification records for advertising and analytics tools all from a single dashboard. Second, it adds security and network control features that are not accessible through Webflow's standard functionality. As noted on Webflow's official Cloudflare integration page, Cloudflare can supplement your site with features not directly available in standard hosting, such as WAF, bot protection, edge caching, and processing via Workers. Third, it makes managing root domains and subdomains much easier.example.com Due to DNS specifications,connecting a root domainhas limitations regarding CNAME usage, but using CloudflareCNAME flatteningmakes it easier to bypass this issue.
When you look at it this way, it becomes clear that Cloudflare is better understood not just as a CDN tool for speeding up page loads, but as a foundation for reliably managing the domain and security of your Webflow site.
First, understand the two connection methods
There are two main ways to connect Webflow and Cloudflare. Understanding the difference between these two methods early on will help you avoid issues during setup.
Method | Overview | Best For | DNS only | Use Cloudflare for DNS management only, leaving SSL and delivery to Webflow | Most standard websites, first-time connections | Orange-to-Orange (O2O) | Connect to Webflow through Cloudflare's proxy | Sites requiring WAF, bot protection, Workers, or advanced cache control
For typical corporate websites or blogs, DNS only is sufficient to start. The Webflow Help Center also recommends setting the Cloudflare proxy status to DNS only (the gray cloud) for standard connections. On the other hand,O2Ois a configuration for when you want to actively use Cloudflare features like WAF or Workers. According to Cloudflare's official Webflow guide, enabling this allows you to apply WAF, Bot Management, Waiting Room, Caching, Workers, and Rules to traffic heading to Webflow. However, it is best to avoid starting with O2O. Enabling the orange cloud in Cloudflare without proper configuration can prevent it from working correctly with Webflow, leading to 525 Handshake Errors or redirect loops. It is safer to connect using DNS only first and migrate to O2O only if necessary.
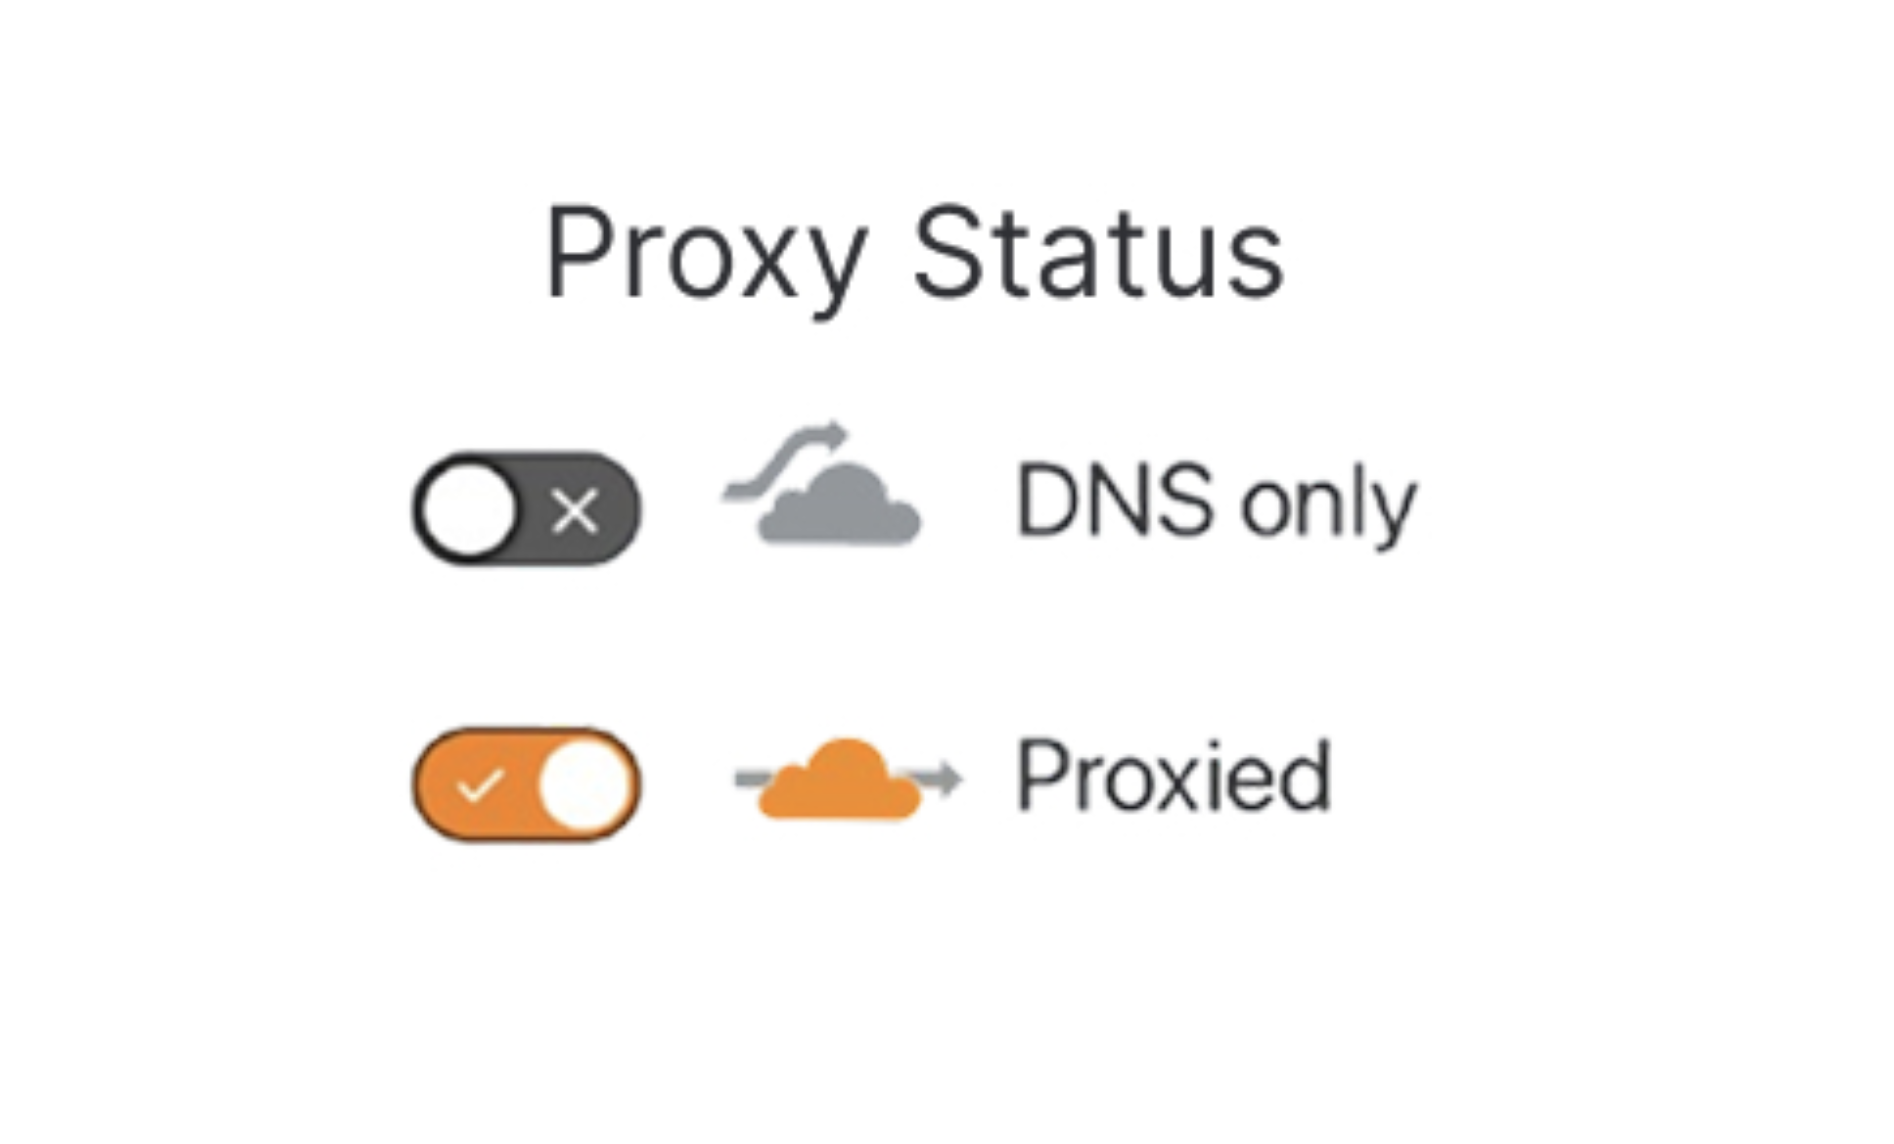
DNS setup flow following official Webflow instructions
The actual connection process follows the official Webflow guide:Connect your Cloudflare domain to WebflowIf you are using Cloudflare for the first time, make sure to create your Cloudflare account and complete thenameserver updatefirst. When connecting a domain managed by Cloudflare to Webflow, the basic process is as follows:
- Ensure the domain is ready to be managed in Cloudflare
- Change the nameservers at your domain registrar to those specified by Cloudflare
- Open
Site settings > Publishing > Productionin Webflow - Check the latest A record, CNAME, and TXT values displayed in Webflow
- Go to
DNS > Records in CloudflareAdd the necessary records to - For standard connections, set the proxy status to DNS only.
- Verify the domain in Webflow, set it as the default domain, and publish.
The most important thing here is not to copy DNS values from old articles or other websites. Since Webflow's infrastructure and records can change, always use the latest values displayed in the Webflow dashboard (Site settings > Publishing > Production) as the source of truth. Webflow's DNS values have undergonerecent specification changes, and using outdated values can cause issues with domain connection and SSL.
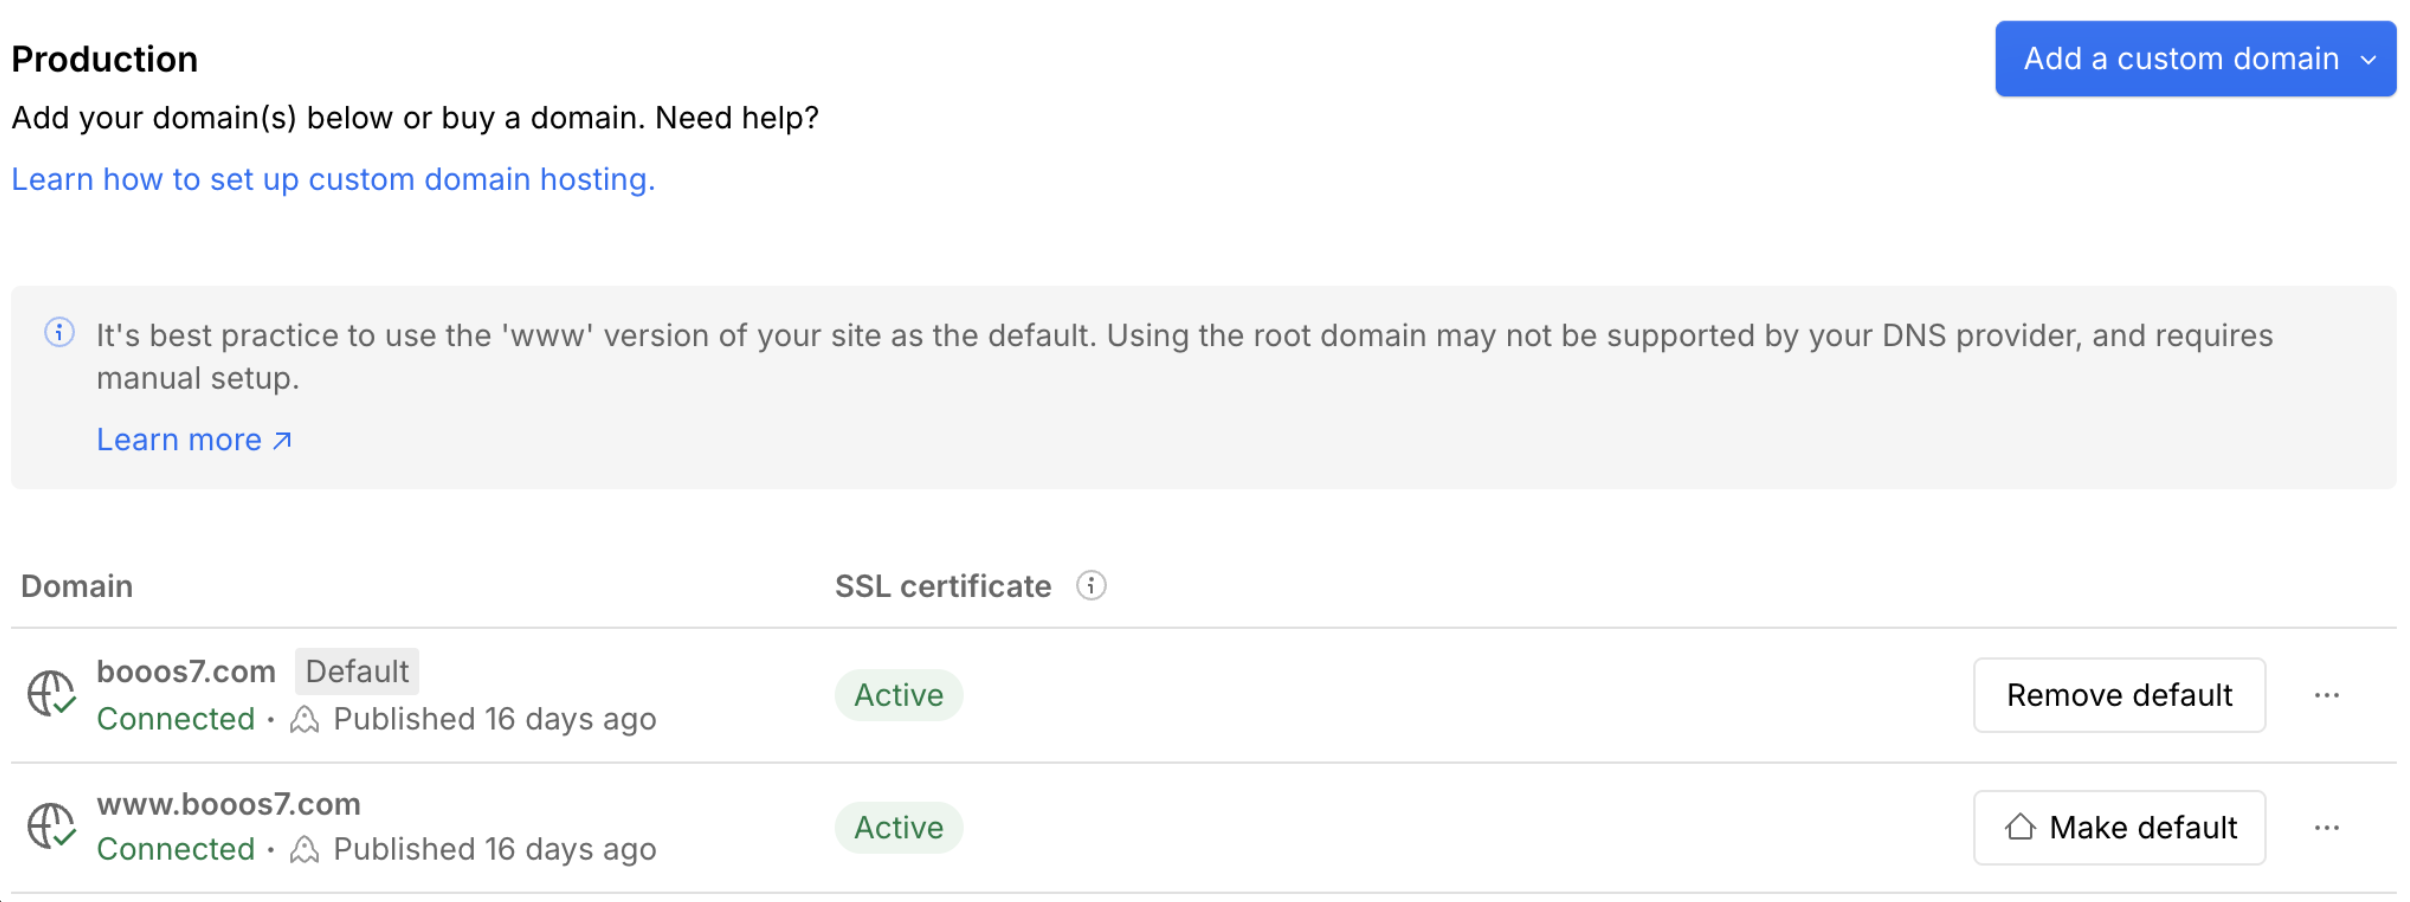
Why Cloudflare is useful for root domain connections
A common stumbling block in Webflow is when you want to usewww.example.com instead of example.com as your primary address.www subdomains are easy to manage with CNAME records, whereaswww -less root do
mains have a constraint where CNAMEs cannot be easily placed due to DNS specifications. This is because root domains require essential records like SOA and NS, and adding a CNAME there can cause conflicts. Cloudflare resolves this issue with a mechanism called CNAME flattening. This allows you to manage root domains with the same ease as CNAMEs, making Webflow's root domain connection much easier to handle.
That said, you don't need to manually manage the intricate details of DNS specifications. In practice, it is sufficient to correctly enter the values displayed on the Webflow Publishing screen into Cloudflare, and www decide whether to use the version with or without it as your primary domain, prioritizing consistency for both SEO and operational purposes.
When to use O2O and when it's unnecessary
The official Cloudflare documentation recommends an O2O configuration for Webflow users who want to use their own Cloudflare zone to sit in front of Webflow. Note that O2O can only be used if the site has already been migrated to Webflow's new DNS (Cloudflare). Sites created on or after April 21, 2025, are already migrated, while older sites must have their DNS updated first. With O2O, you can layer Cloudflare's features directly onto traffic heading to Webflow. Specific use cases include applying a WAF to your Webflow site, utilizing Bot Management or Waiting Room, adding redirects or lightweight processing via Cloudflare Workers, controlling delivery with Cache Rules, and hosting multiple services under the same domain.
Conversely, for standard corporate sites, landing pages, blogs, or recruitment sites where basic DNS connection and publishing are sufficient, O2O is not mandatory. It is safer to start with a DNS-only connection and only consider O2O when you truly need these advanced features. The official Cloudflare documentation also notes that when O2O is enabled for a hostname, Cloudflare settings directly impact traffic, which increases the operator's responsibility. While convenient, keep in mind that incorrect WAF or cache configurations can affect form submissions and site display.
Ensuring success with SSL and redirects
Common issues when integrating Webflow and Cloudflare often involve SSL and redirects. Most of these can be prevented by understanding how the system works. In a standard DNS-only connection, Webflow manages SSL and delivery, so the Cloudflare record should generally remain set to DNS-only. If you enable the Cloudflare proxy while using standard hosting, the TLS handshake between Cloudflare and Webflow will fail,525 Handshake Errorwhich may result in a . On the other hand, when using O2O, you must set theSSL/TLS modein Cloudflare to "Full" or "Full (strict)." Avoid selecting "Flexible," as this causes communication from Cloudflare to Webflow to occur over HTTP, which conflicts with Webflow's HTTPS redirect and can lead to ERR_TOO_MANY_REDIRECTS(a redirect loop).

One more thing to note is if you have enabledZone Hold(a setting primarily used in Enterprise plans). According to the official Webflow guide for Cloudflare, if Zone Hold is enabled, you cannot activate a custom hostname onboarded to Webflow, and an error indicating that it is "associated with a held zone" will appear in Webflow. Since SSL certificate issuance will halt if the custom hostname cannot be activated, for corporate or large-scale operations, you will need to temporarily disable Zone Hold and then re-enable the custom hostname. This is not a setting typically touched for small sites, so just keep it in the back of your mind for larger configurations.
Summarizing what you can do with Webflow and Cloudflare
Based on the information above, here is a summary of what you can actually achieve by combining Cloudflow and Webflow. For Webflow creators and marketers, these are the four key use cases to keep in mind.
Securely connect to Webflow via DNS settings
This is the most fundamental approach. By managing your DNS through Cloudflare and simply entering the values displayed on the Webflow Publishing screen into Cloudflare, you can reliably operate your custom domain. No coding is required, and it is an easy configuration to start with, even on Cloudflare's free plan.
Protect forms and landing pages with WAF and bot mitigation
On Webflow sites, contact forms, resource request forms, and job application forms can become targets for spam and attacks. By using Cloudflare, you can addWAFandbot mitigationto these entry points. However, since overly strict security can sometimes block legitimate user submissions, it is practical to adjust the intensity while monitoring Cloudflare's Security Events.
Add redirects and lightweight processing with Workers
Cloudflare Workersallow you to execute URL processing and API integrations in front of your Webflow site. For example, you can implement extensions such as routing specific paths to different services, inserting processing before or after form submissions, or purging cache in response to Webflow CMS publishing events. This is an area where you can use code to supplement fine-grained control that is difficult to achieve with standard Webflow features.
Add Turnstile and Web Analytics
Cloudflare TurnstileandWeb Analyticscan be added via Webflow's custom code. These are options if you want to implement spam protection for forms or access analytics that are less dependent on cookies. Note, however, that if you intend to use Turnstile in a production environment, you will need to design server-side validation; simply pasting the code is not enough to provide full protection.
Troubleshooting checklist
If your site doesn't display, you encounter SSL errors, or forms stop working after configuration, the fastest way to resolve the issue is to narrow down the check points for each symptom rather than changing settings at random.
DNS changes can take effect immediately, but they may also take up to 48 hours to propagate. Changing records repeatedly just because the site isn't displaying will only make it harder to identify the cause. First, stay calm and verify that the values shown on the Webflow Publishing screen match the DNS values in Cloudflare. Then, check the proxy status and SSL/TLS mode in that order to more easily pinpoint the source of the problem.
Video Tutorial
You can also watch a video version of this article on YouTube. Check it out if you're interested.
▼ Watch the video here
Summary
Using Cloudflare with Webflow offers benefits that go far beyond simple speed improvements. Both Webflow and Cloudflare provide official guidance on how to integrate them, and given the advantages for root domain connection, DNS management, SSL, security, and future scalability, it is well worth understanding how Cloudflare works. The standard approach is to first check the latest DNS values in the Webflow Publishing settings, then connect securely via Cloudflare using "DNS only" mode. From there, you can scale up seamlessly by adding features like WAF, bot protection, Workers, and cache control as your needs evolve.
When set up correctly, Webflow and Cloudflare are a powerful combination that can significantly enhance your site's DNS management, security, and scalability. Conversely, a single mistake in proxy or SSL settings can lead to deployment issues, such as the site failing to load, SSL errors, or broken forms. If you have any concerns about DNS settings or Cloudflare integration for your Webflow site, please feel free to contact Booost.
Booost is a web development service specializing in the no-code tool "Webflow."
We maximize your website's customer acquisition power through three optimizations: design, marketing, and translation.

