
How to Upload Files Using Uploadcare in Webflow

When creating forms in Webflow, there may be times when you want to allow users to upload files.
This article clearly explains how to upload files using Uploadcare in Webflow, as well as how to customize the appearance of embedded forms.
Why you should use Uploadcare
To use the file upload feature in Webflow, you need to subscribe to the Business plan ($39/month). Switching to this plan incurs an additional monthly cost of $20 (approximately 3000 yen) compared to the CMS plan ($16/month). Uploadcare offers a free plan and integrates smoothly with Webflow, making it an excellent choice if you want to easily implement file upload functionality.
How to Upload Files Using Uploadcare: Steps
1. Create an Uploadcare Account
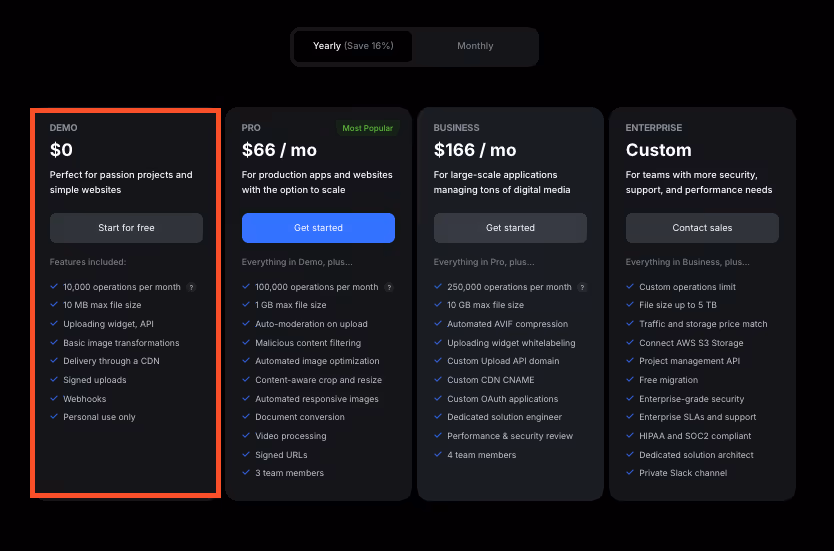
Source:https://uploadcare.com/pricing/
First, visit the official Uploadcare website and create an account. Enter the necessary information, such as credit card details and plan selection. For the plan, please register for the "Demo Plan ($0/month)," which allows you to upload files up to 10MB for free.
2. Create a Project
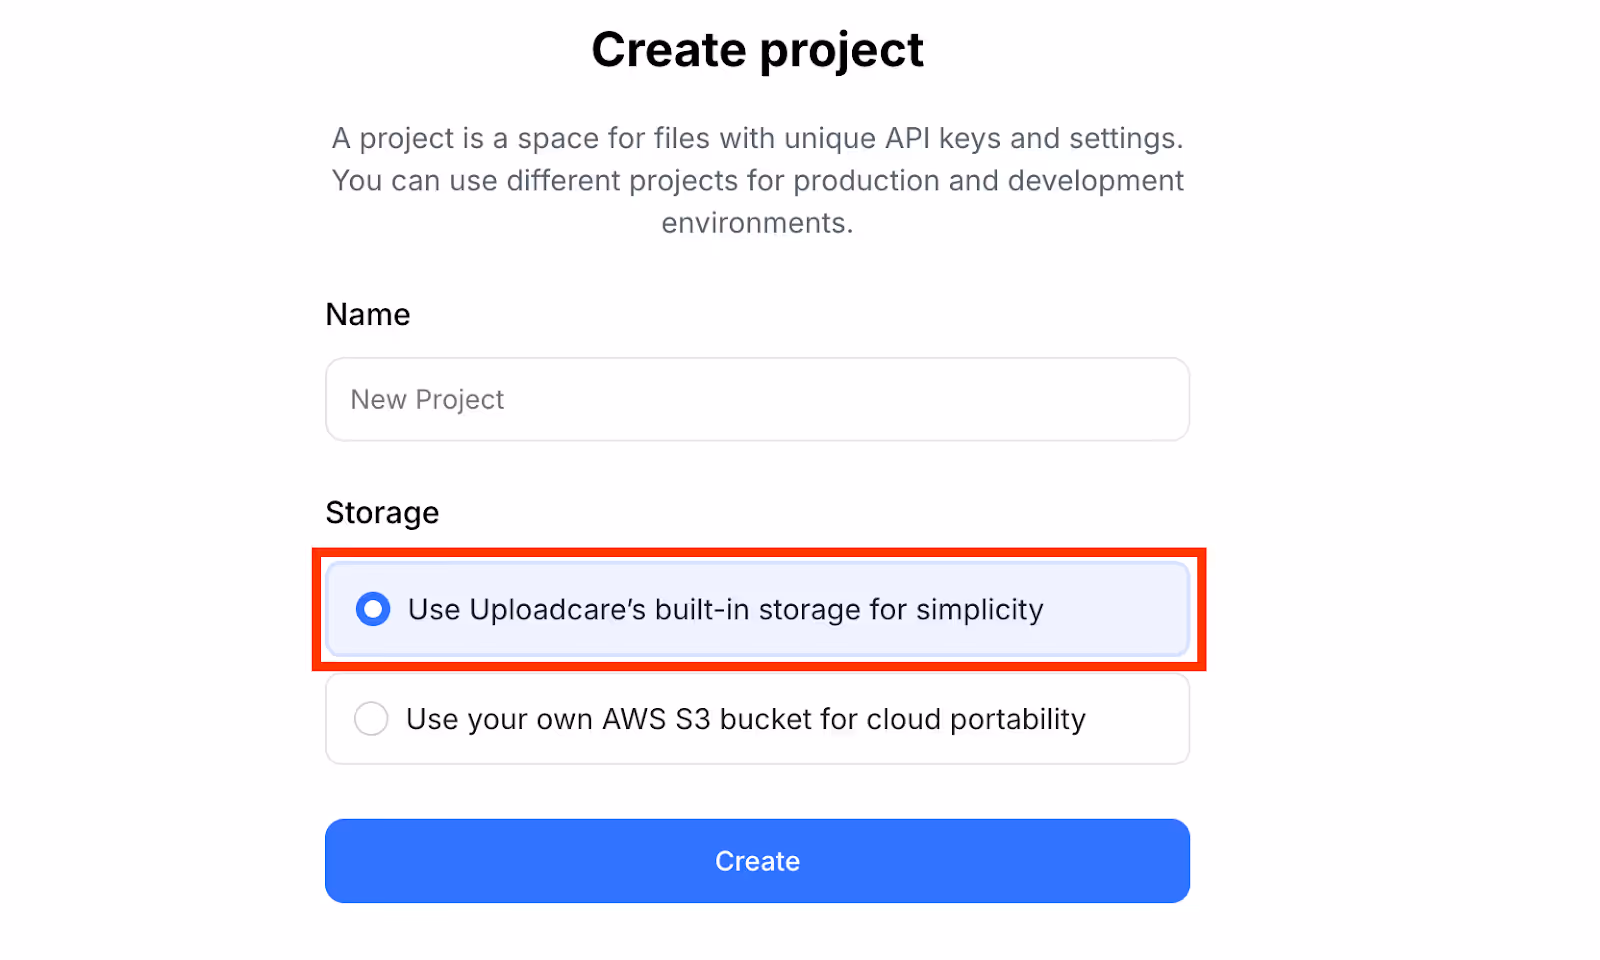
Once your account is created, log in to the Uploadcare dashboard and create a new project. For storage, we recommend selecting "Use Uploadcare’s built-in storage for simplicity."
3. Embed the Uploadcare Widget in Webflow
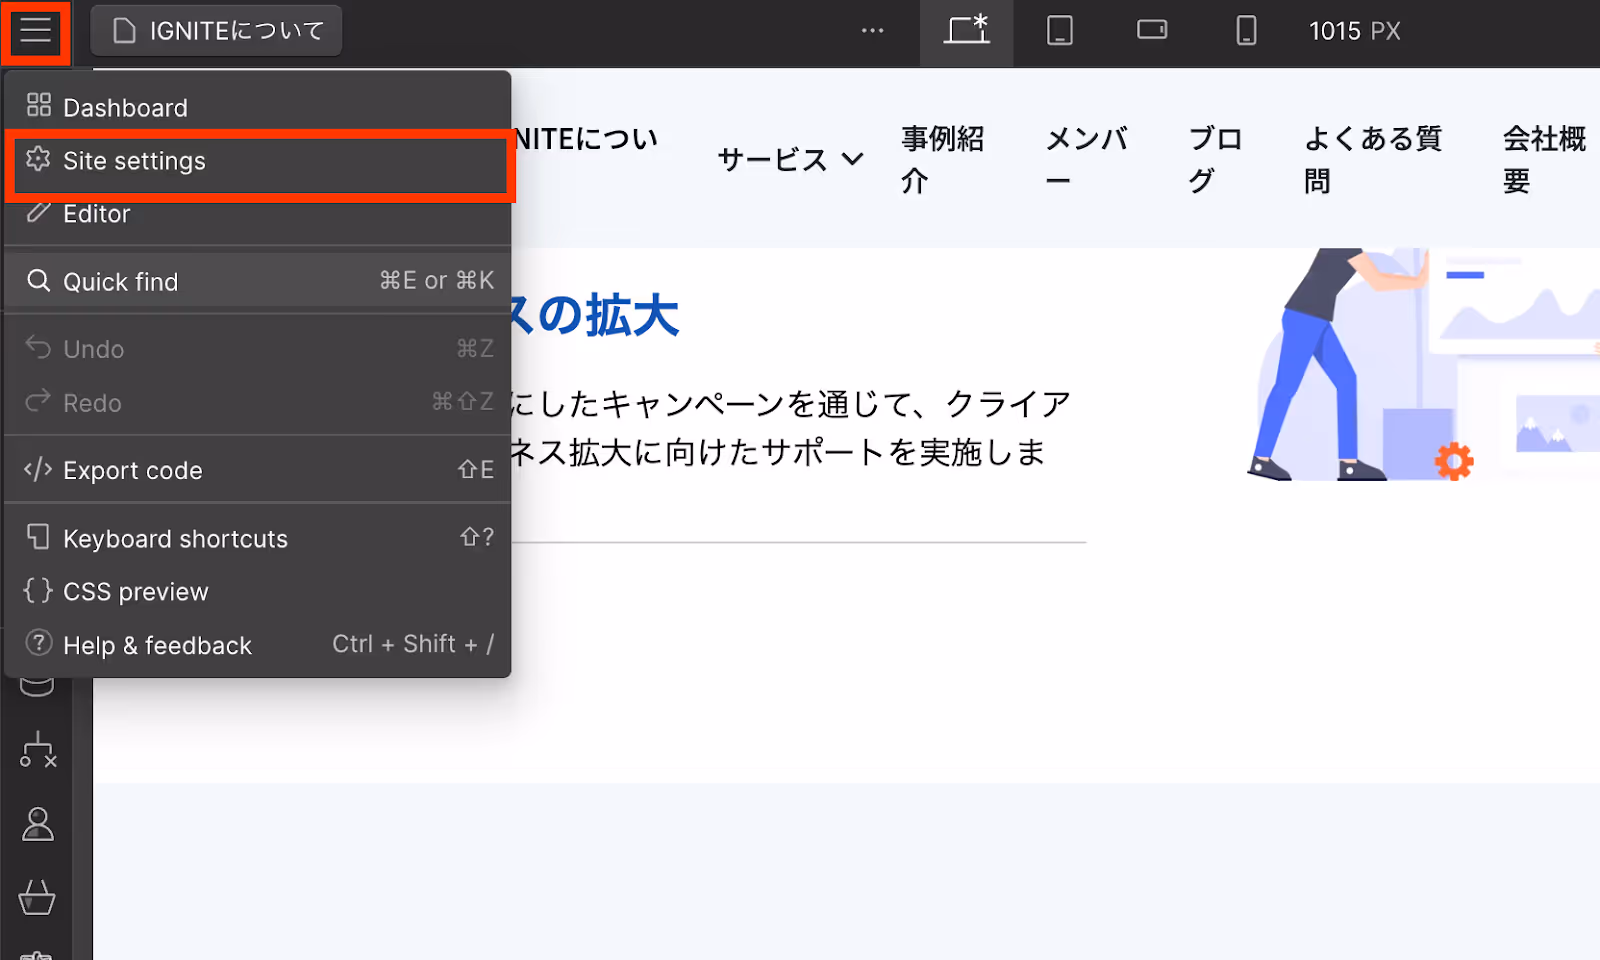
First, select your project in the Webflow dashboard and navigate to Site settings.
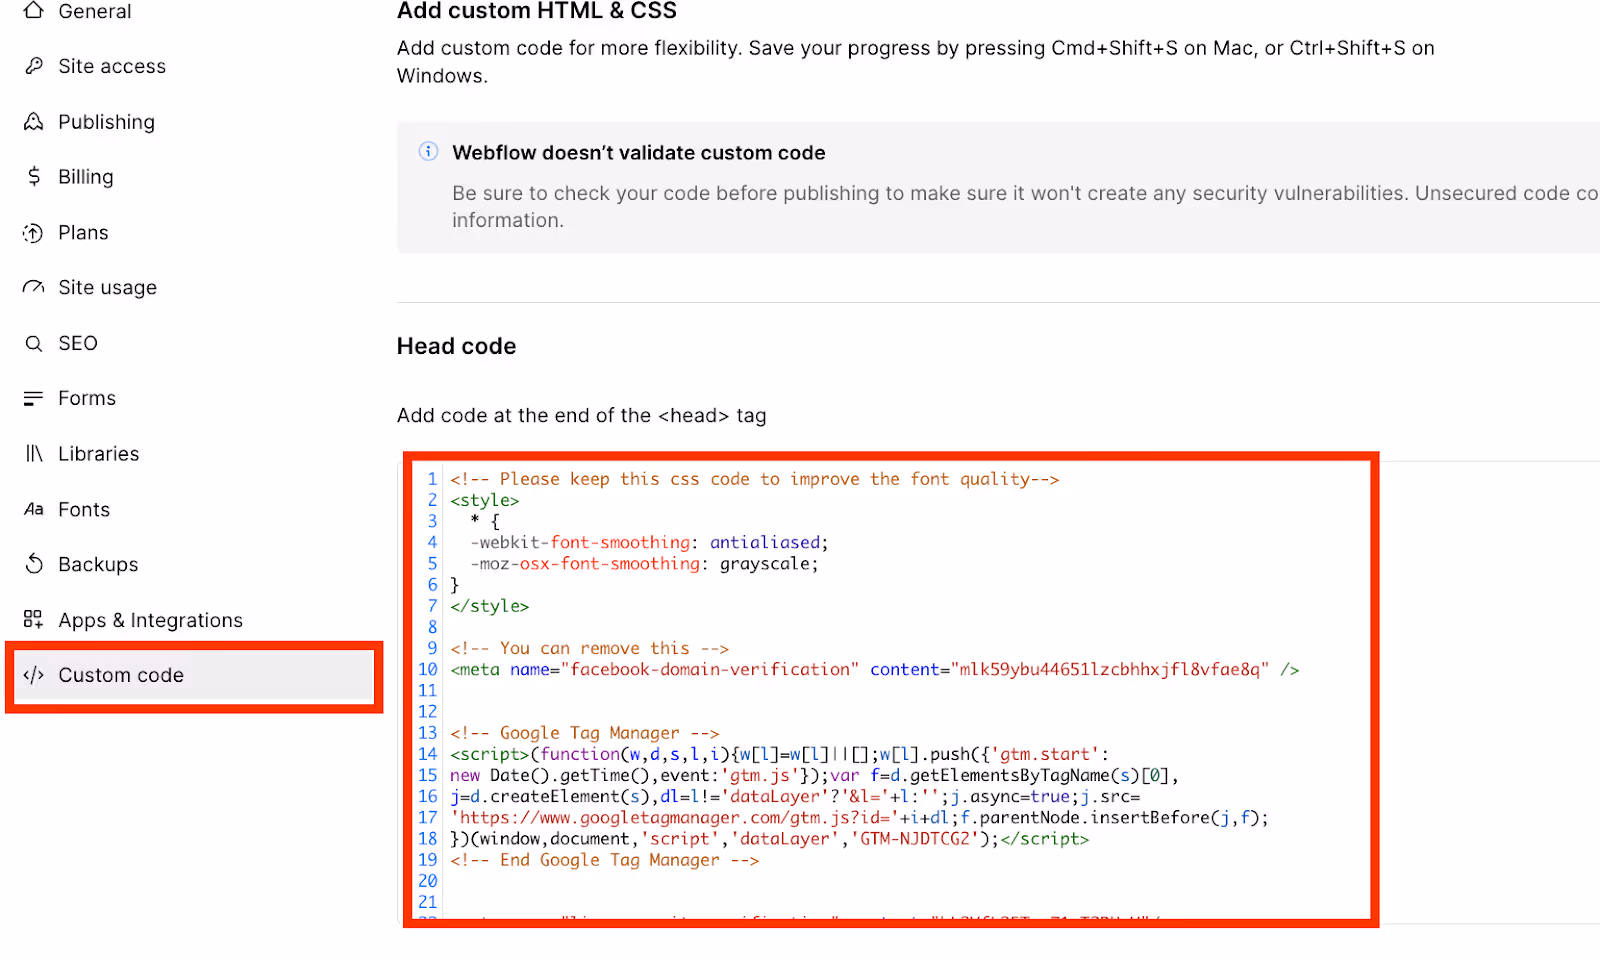
Next, open the Custom Code tab and paste the Uploadcare script into the Head code.
4. Create a File Upload Form
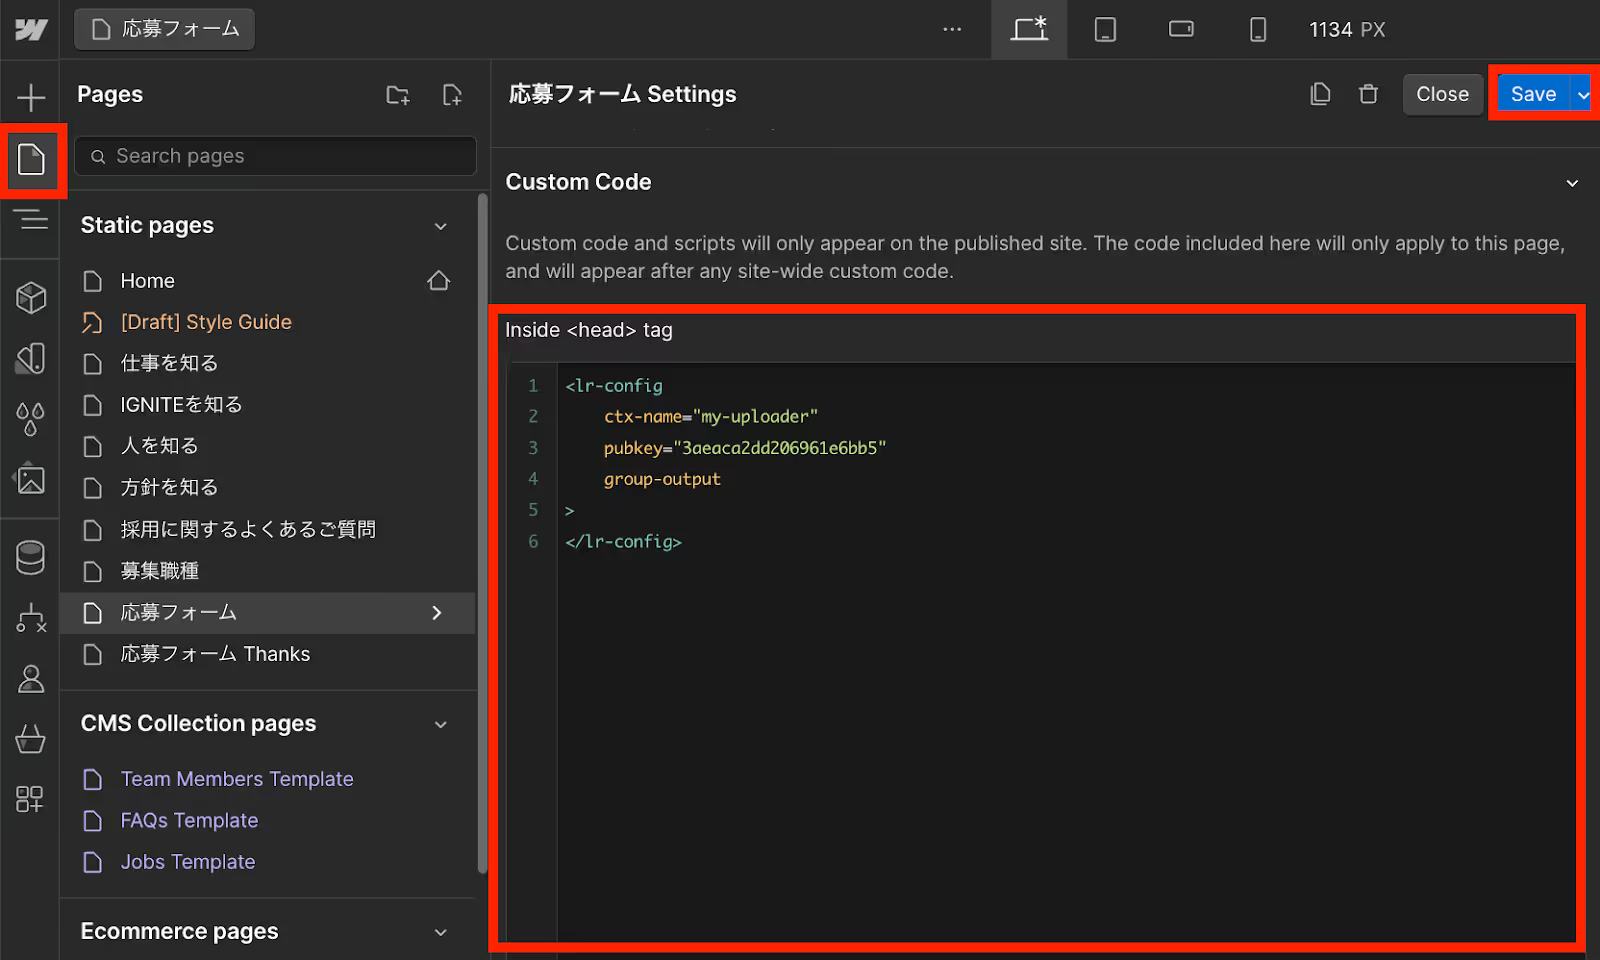
From Webflow's "Pages," select the relevant page, paste the following code into "inside<head>tag" within Custom Code, and click Save. This will set up your file upload form.
5. Add a File Uploader Component to Your Webflow Form
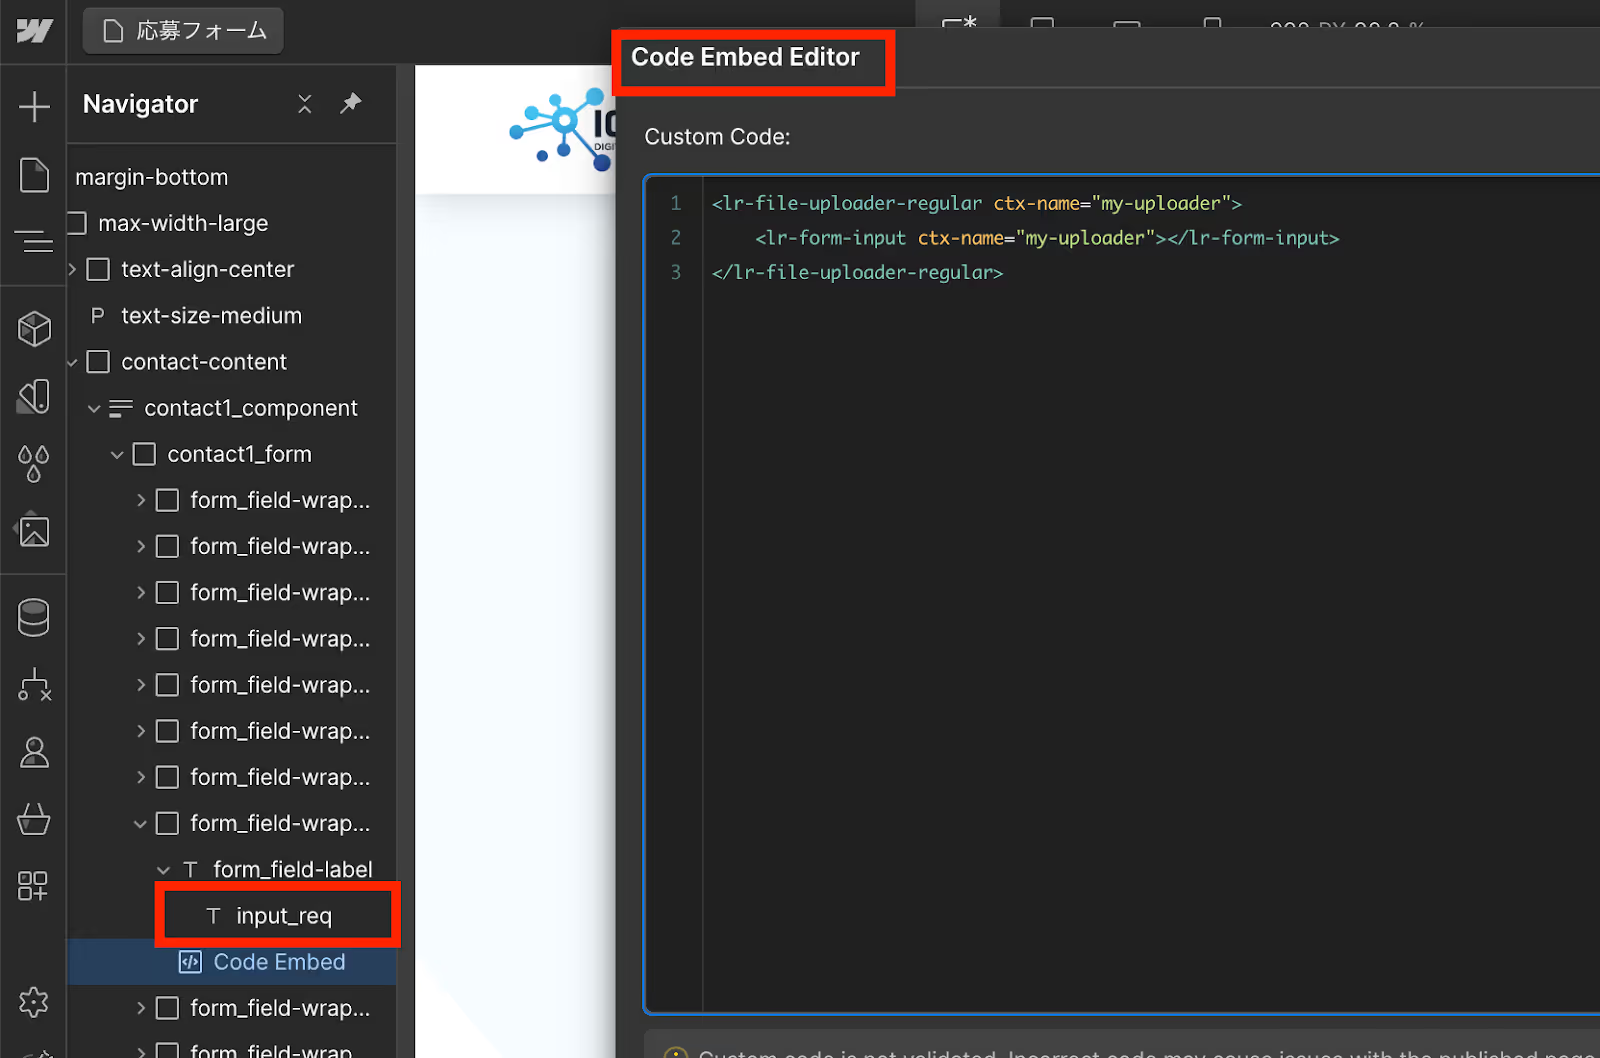
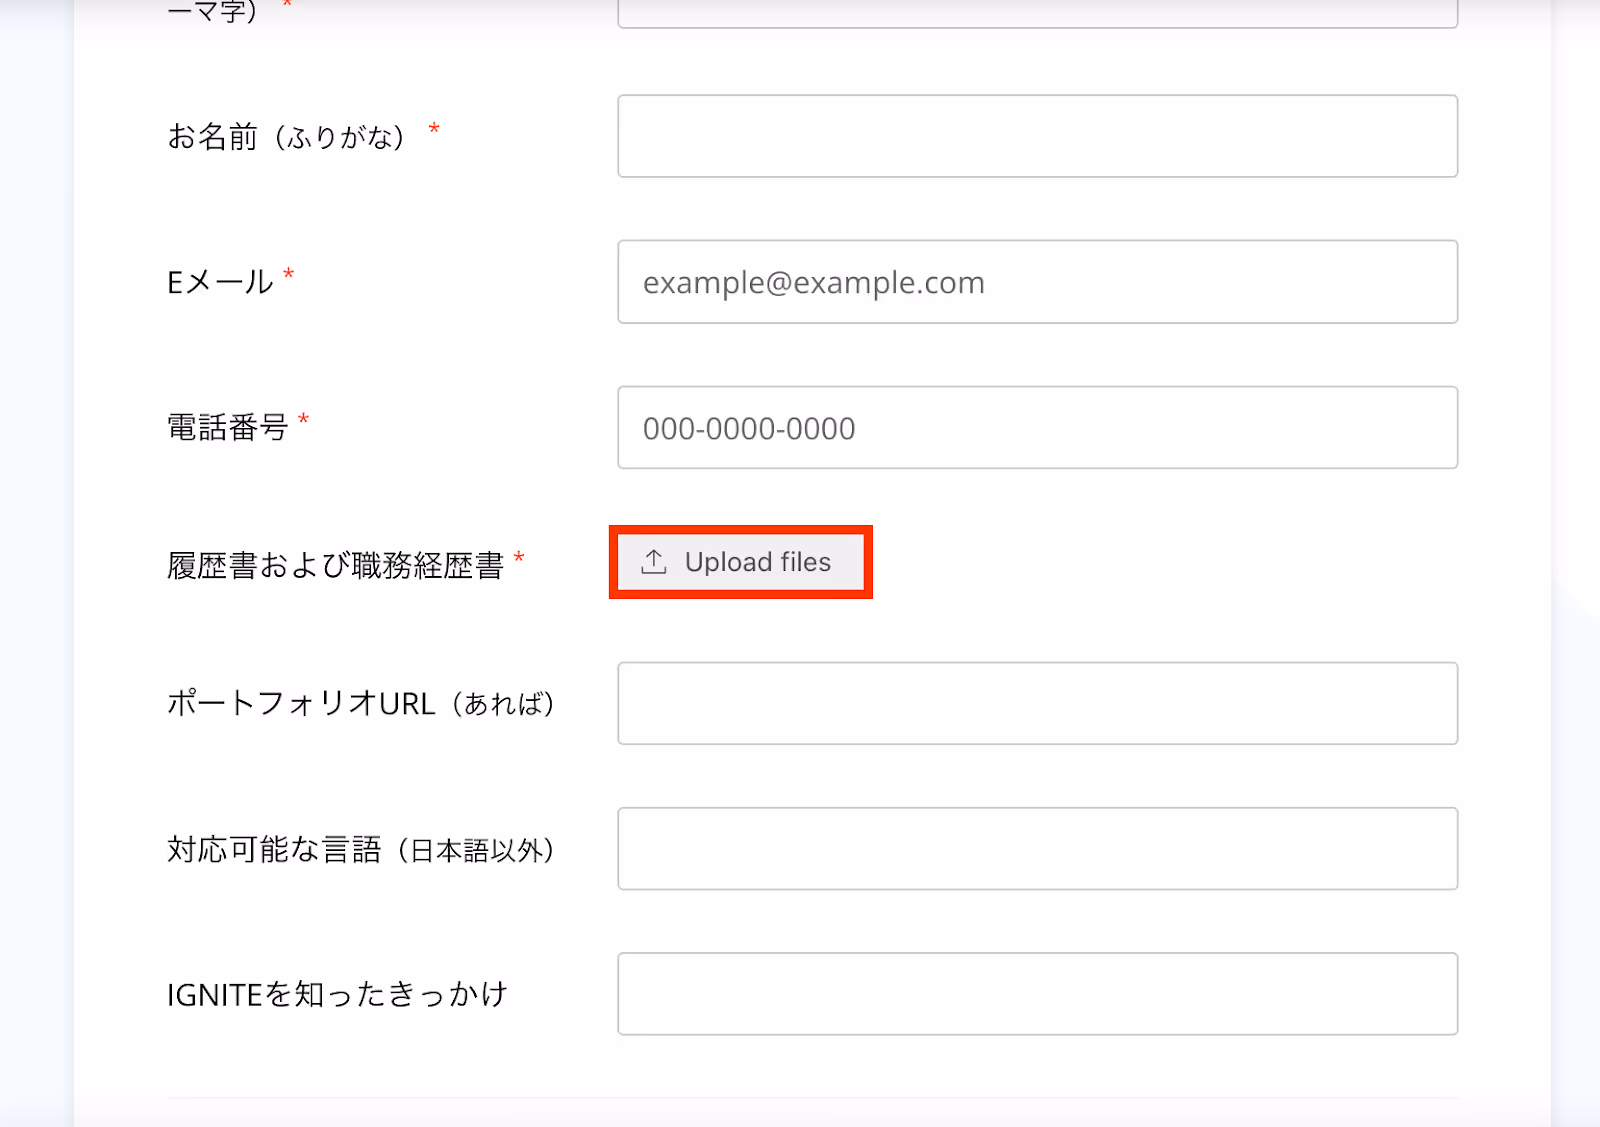
To implement file upload functionality in Webflow, you need to add HTML code to the form-input. *For this example, we will implement the upload function in the resume upload section of the IGNITE application form.
In Webflow, press Command + K for quick search, then search for "Code embed" and click it.
* "Code embed" is a tool for embedding custom code into your Webflow design.
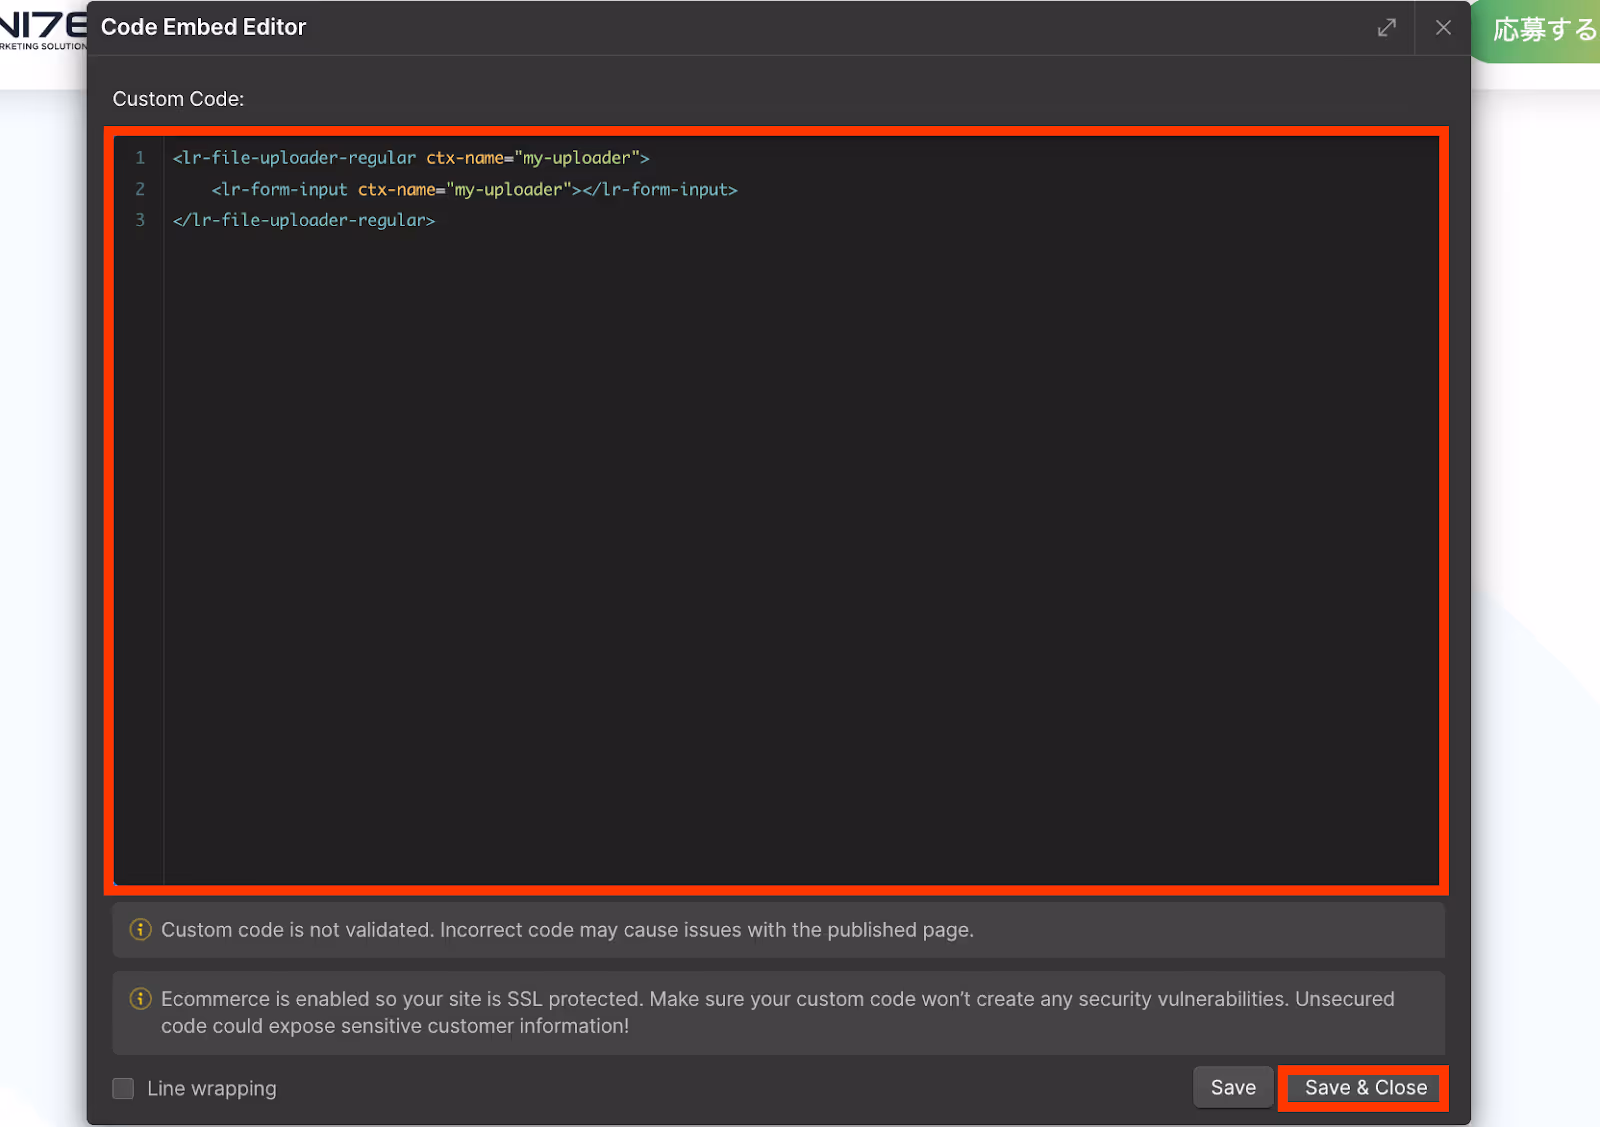
Next, insert the following code into Custom Code, then click Save and Close.
6. Test File Upload
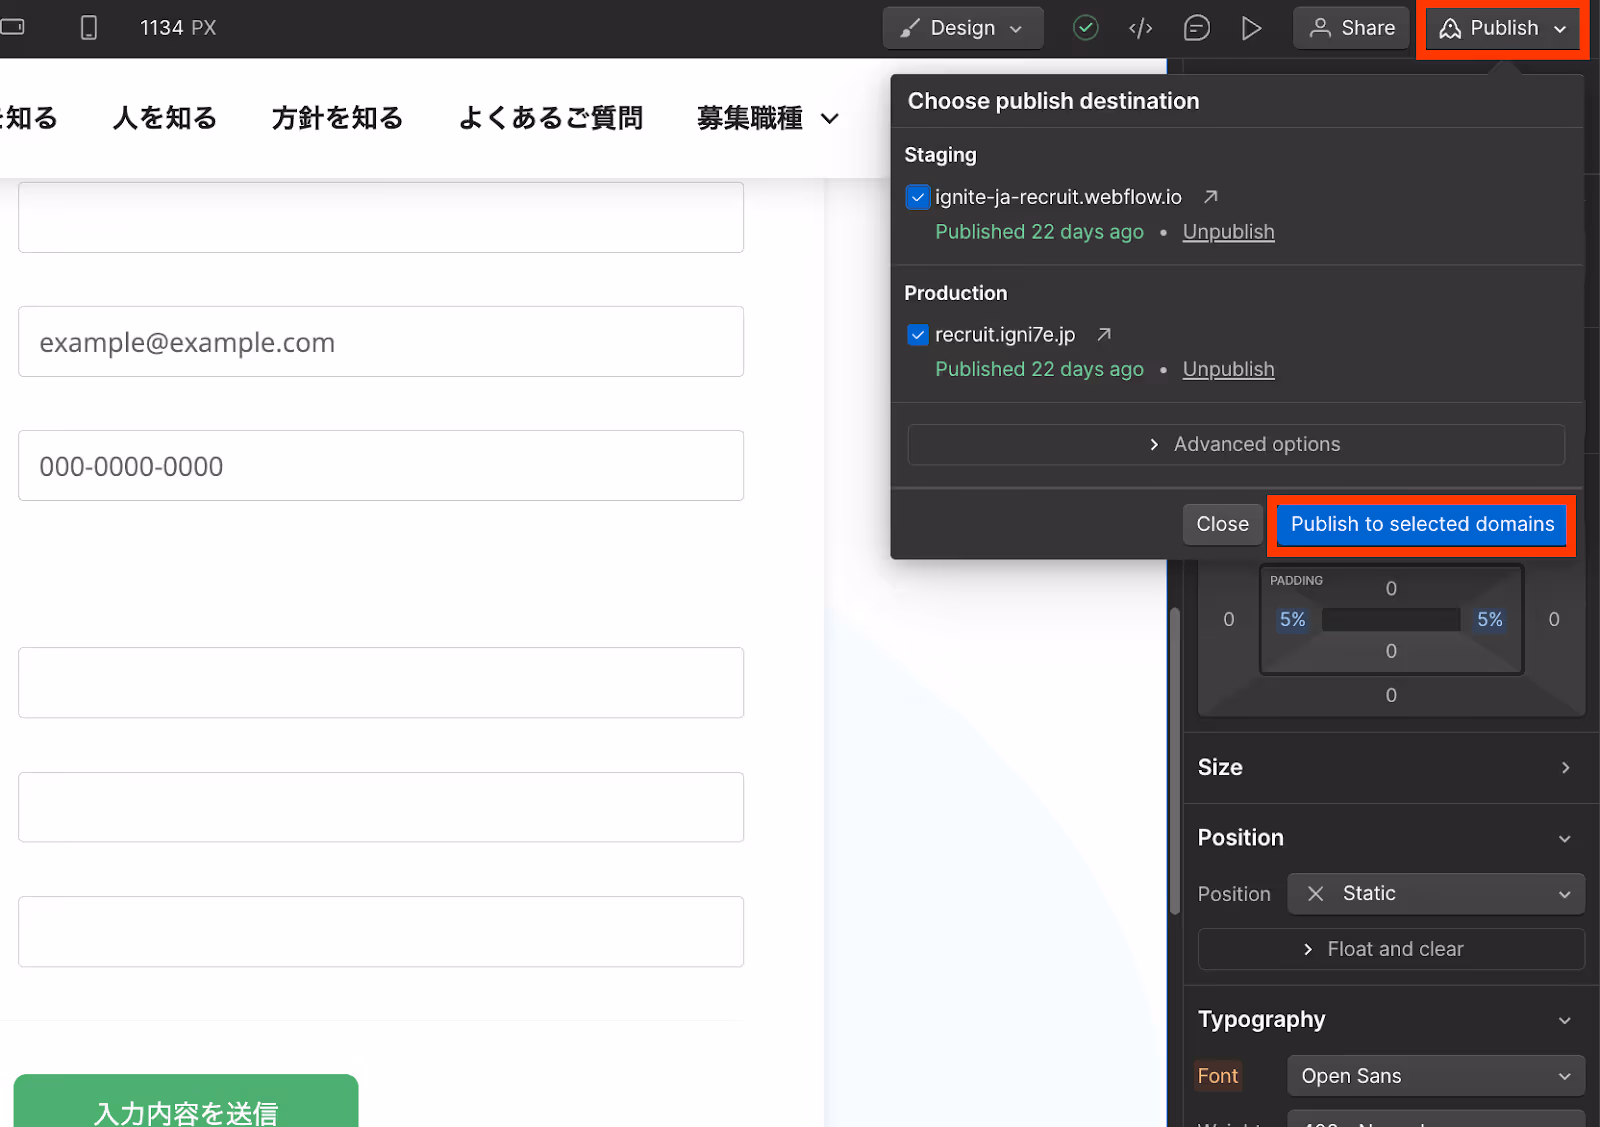
To confirm that the HTML changes have been applied, click "Publish to selected domains" to publish
your site.
Next, let's test if the file upload form you've set up is working correctly.
Publish your Webflow page and click "Upload files."
Reference:IGNITE Application Form here
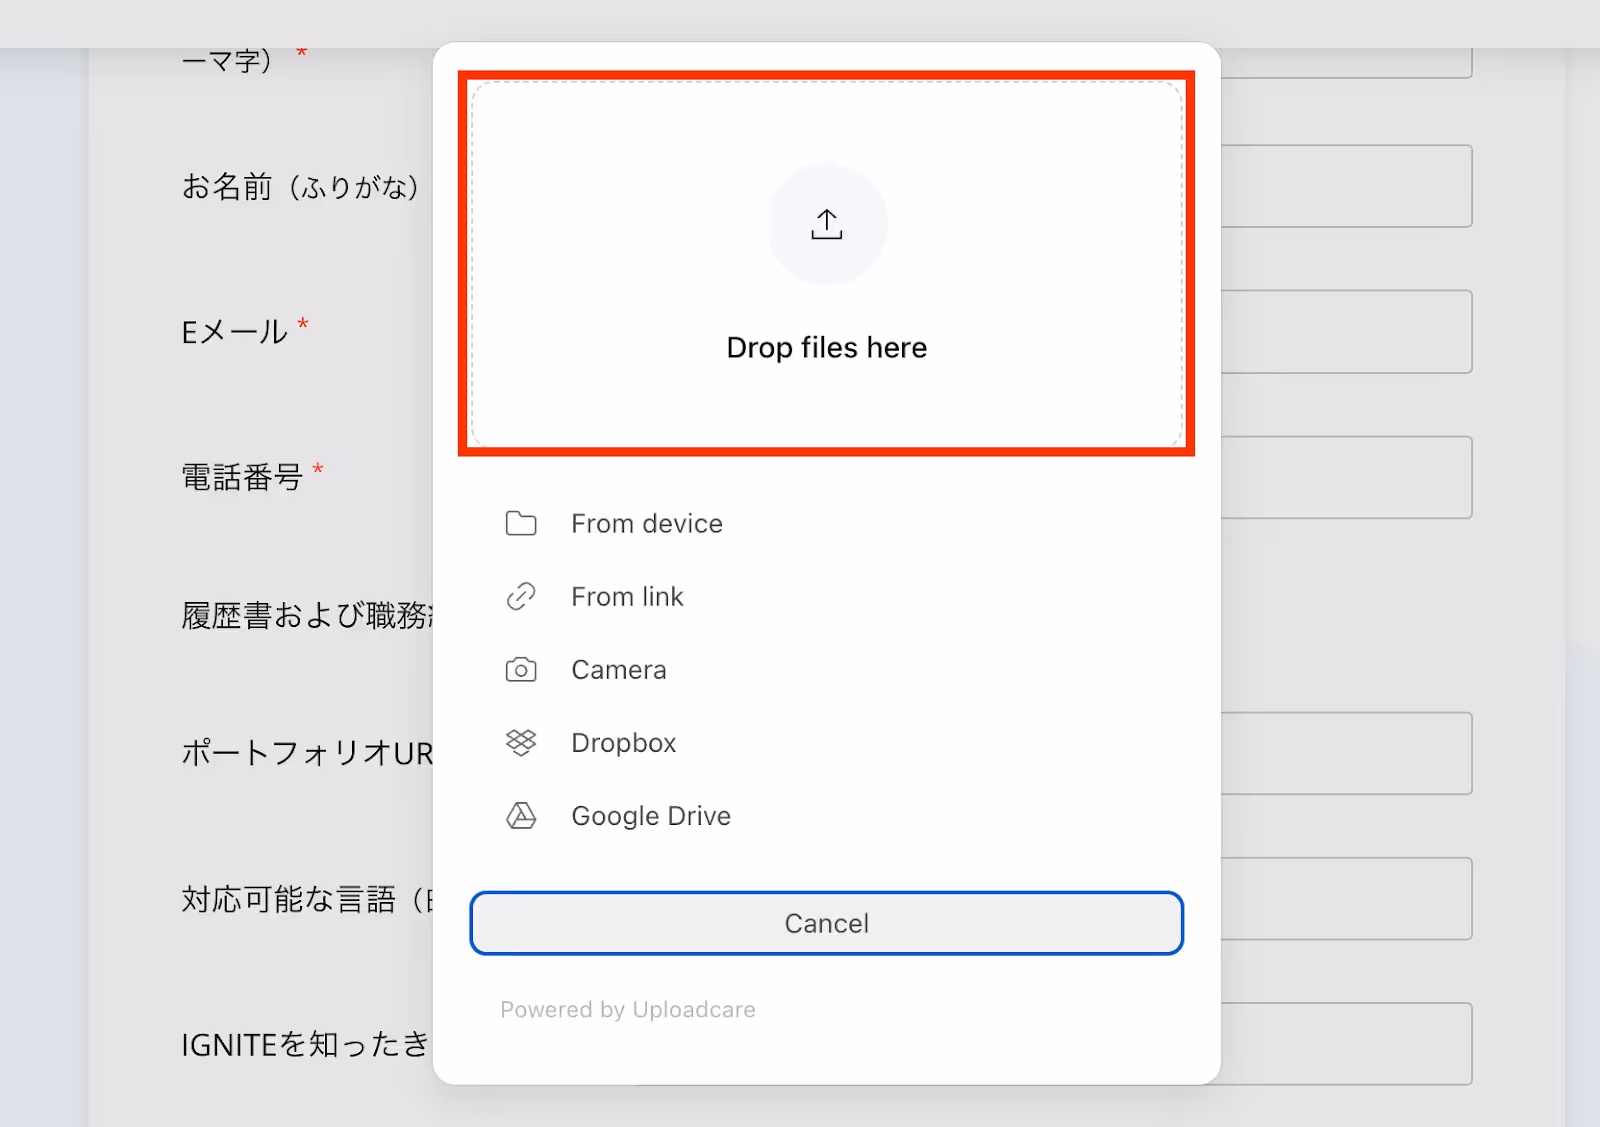
Click "drop files here" and upload a suitable test file.
Open the Uploadcare Files tab, confirm that the test file you just uploaded is there, then click "Publish to selected domains" in Webflow again.
How to Remove Empty Fields
Sometimes, an "Empty field" may appear when submitting a form. This could be due to errors in JavaScript or custom code. Here's how to remove empty fields.
1. Add a Custom Element

Since there might be an issue with buttons using JavaScript or custom code, we will create a new button. First, search for "Custom Element" in Webflow and add it to your form. Custom Elements allow you to easily reuse buttons with the same design across multiple pages or projects.
2. Button Settings
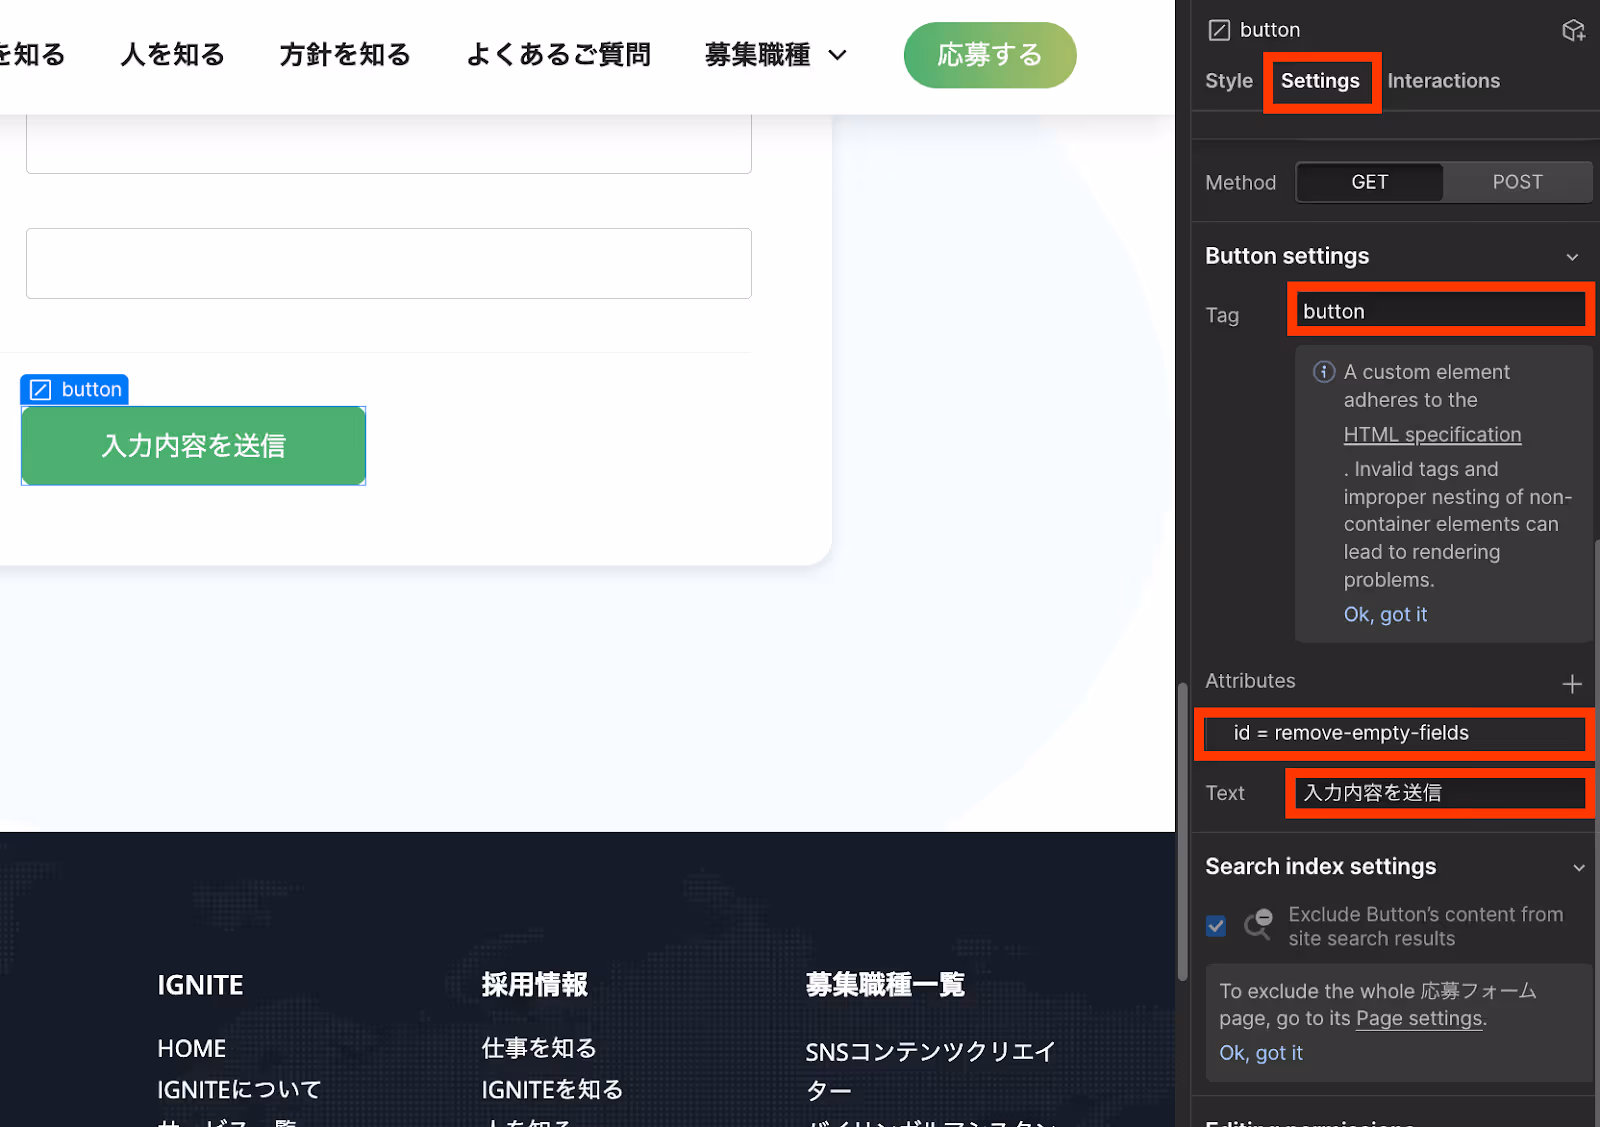
Go to the settings panel on the right side of the screen and set the specific ID and text as follows:
- Enter "button" for Tag
- Enter "id=remove-empty-fields" for Attributes
- Enter the button name for Text (in this case, we will enter "Submit your entry").
3. Layout Settings
To hide the layout of the button you previously created, follow these settings:
(1) Display Settings
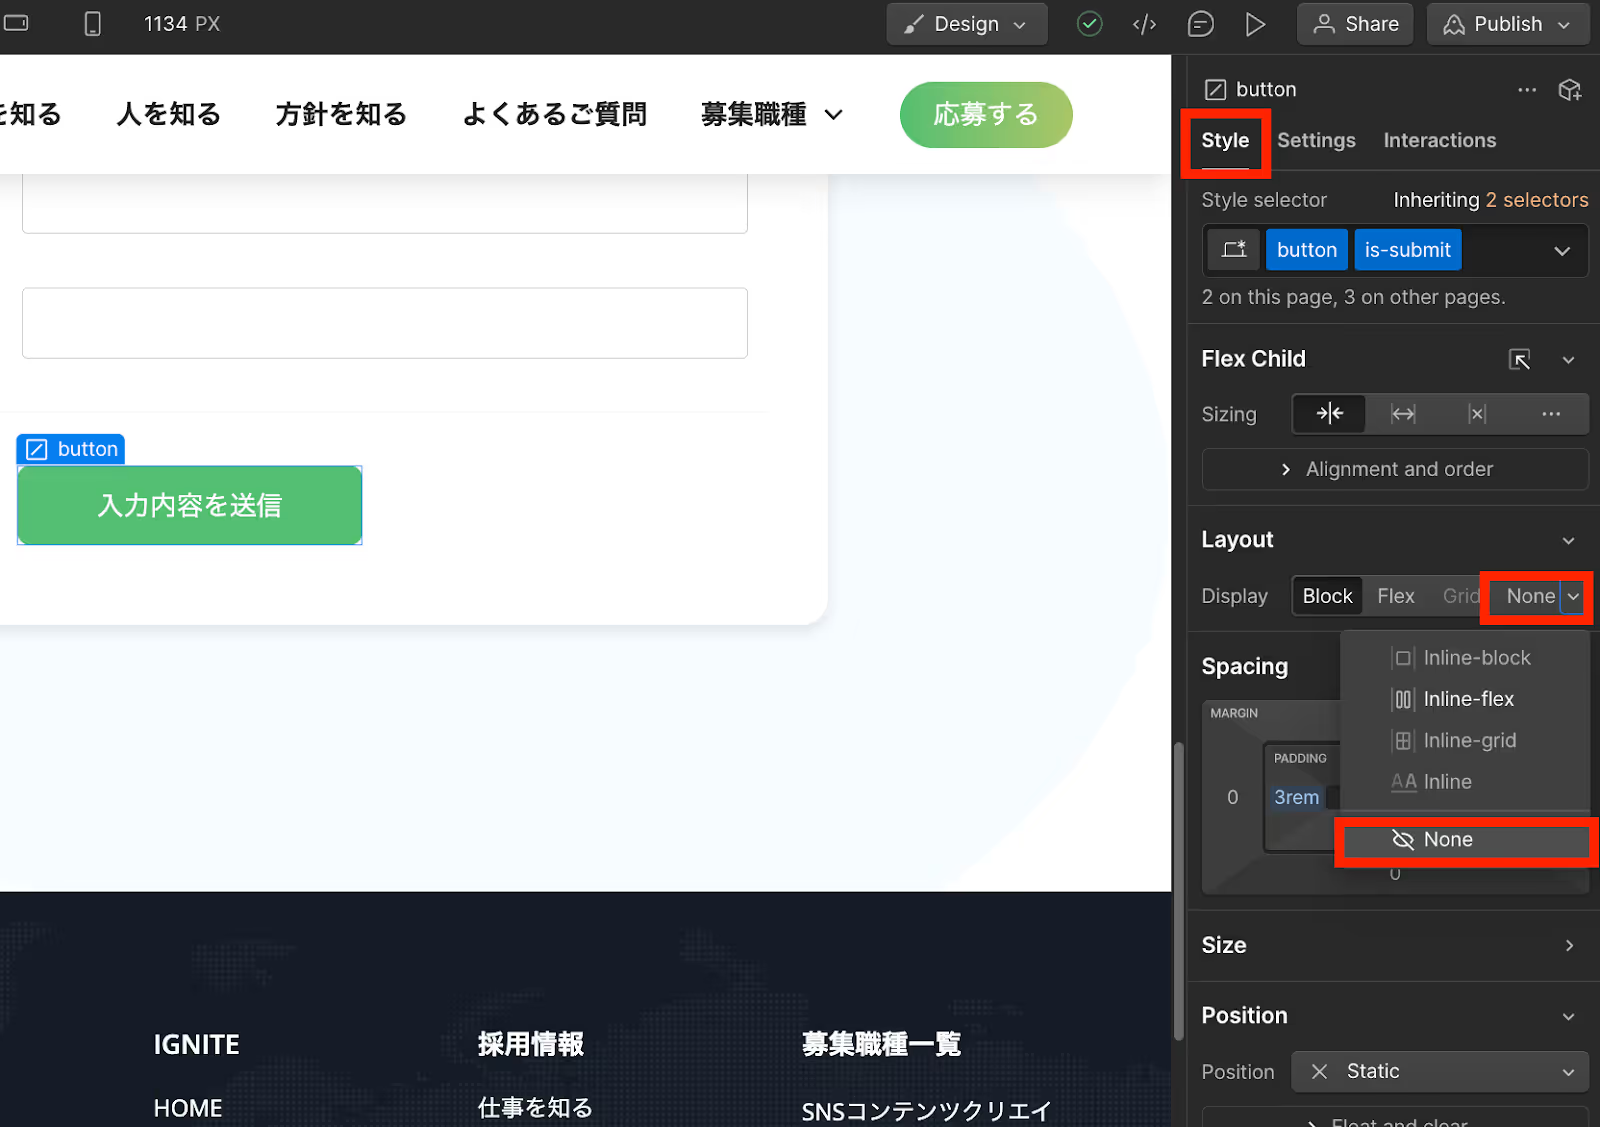
Click the original submit button and set its display property to "None." Alternatively, you can hide it by adding "is hidden" to the style selector. This will hide unnecessary elements (the original button).
(2) Add Code to Site Tags
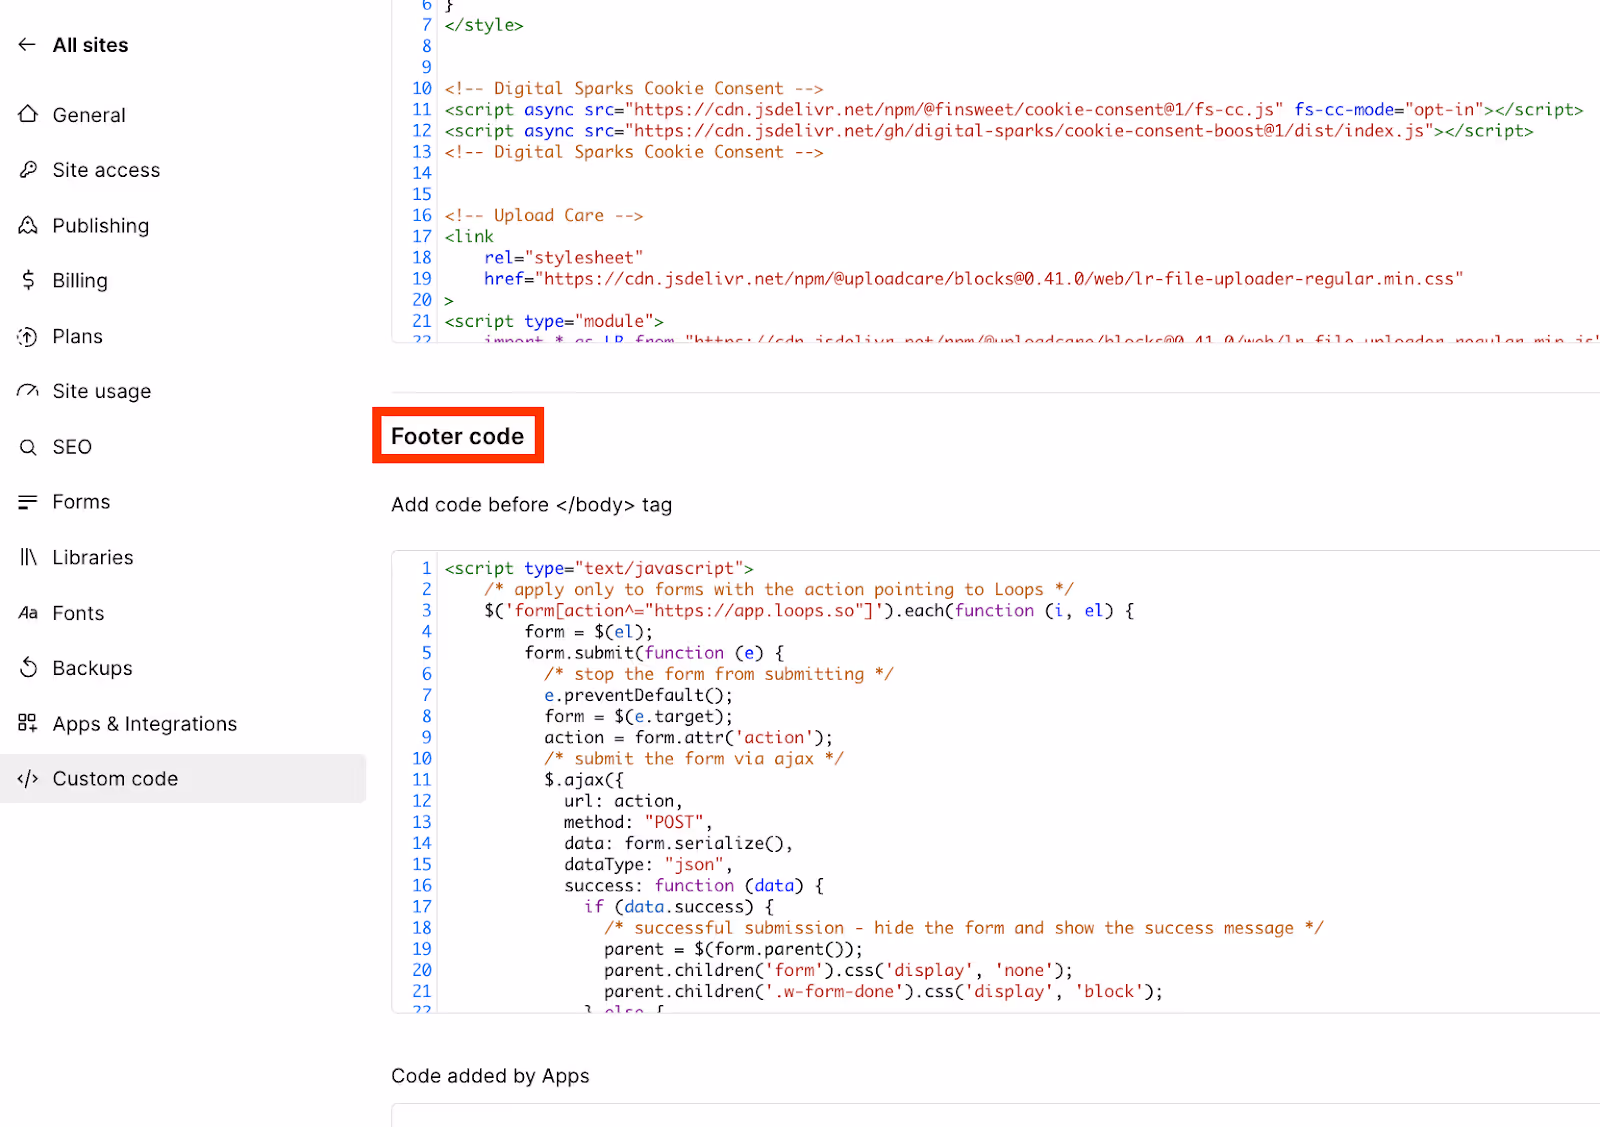
Add it to the site tags to hide it. For site tags, insert the following code into the Footer code and Publish.
4. Replace with a New Button
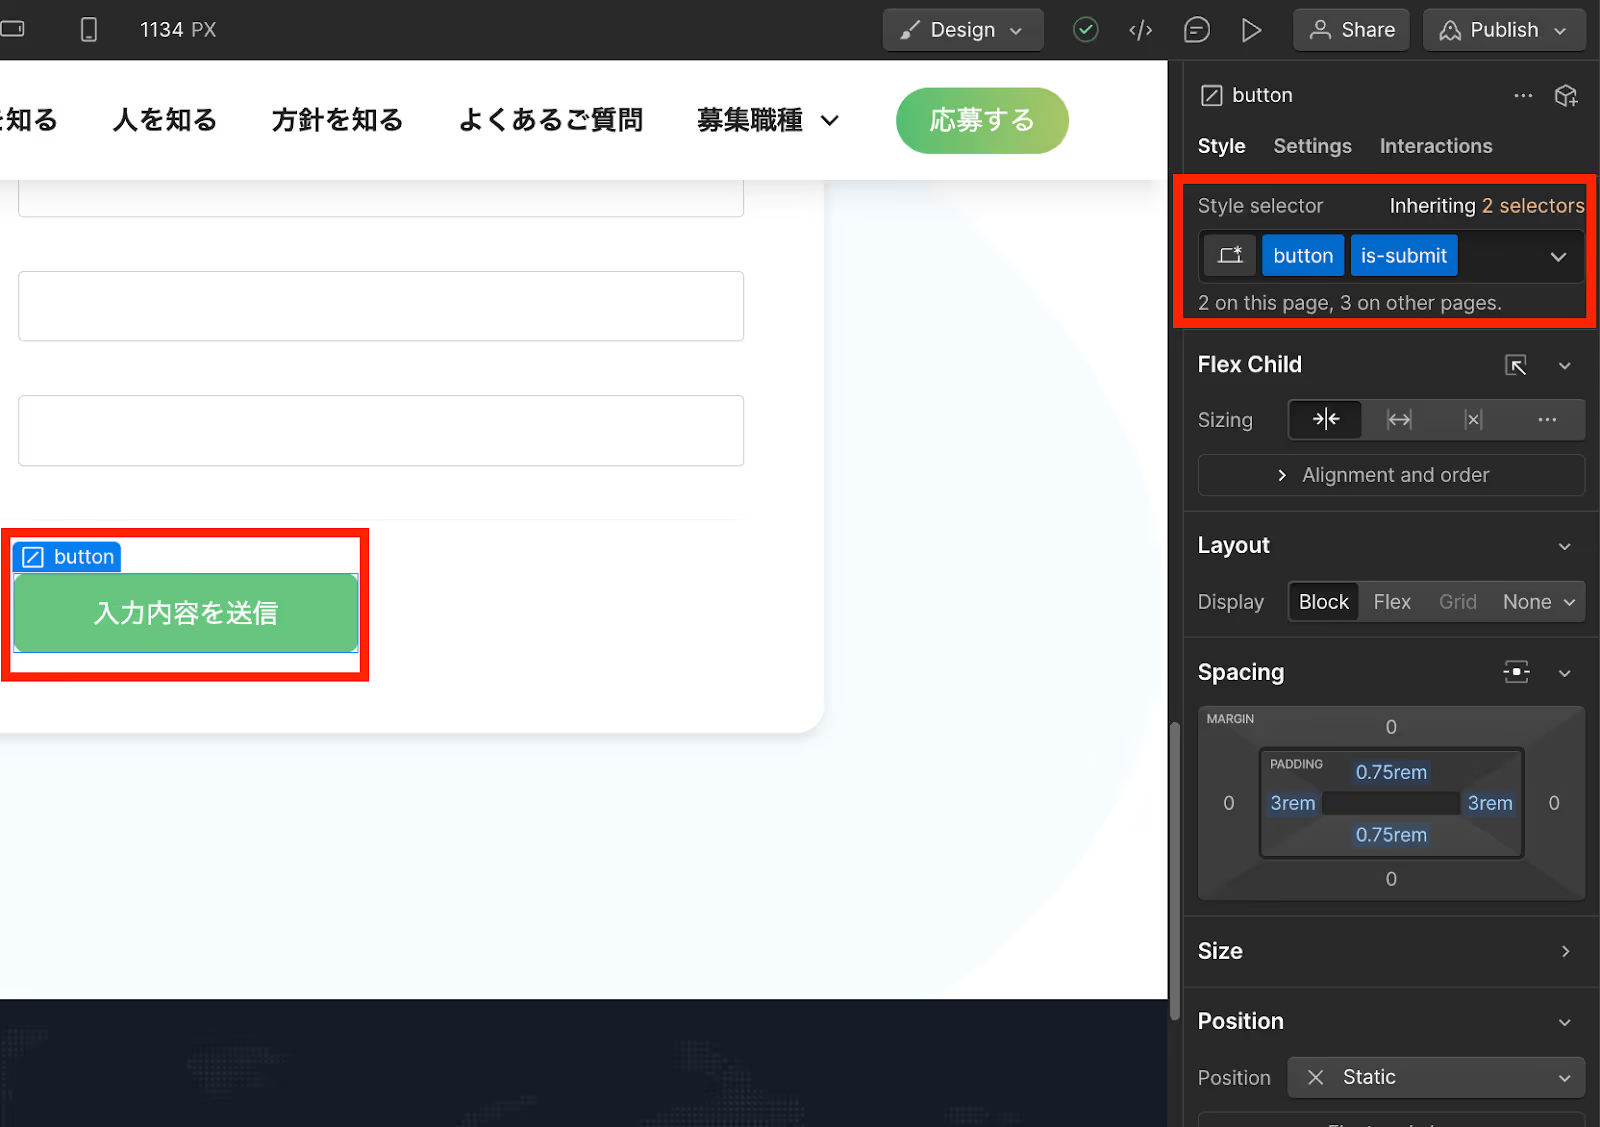
Hide the original button and replace it with the new one. Display the newly created button where the original button was.
Finally, Publish your changes. If the final check is okay, the setup to remove empty fields is complete. Confirm that form submission works correctly and adjust settings as needed.
Summary
Achieve Low-Cost and Easy File Uploads in Webflow
By using Uploadcare, you can easily implement file upload functionality in Webflow. While Webflow's file upload feature requires a Business plan ($39/month), Uploadcare offers a free plan, allowing for cost-effective file uploads. Also, ensure that forms frequently implementing file uploads function correctly. If you can't find a solution after reading this article, please feel free to contact us.
Booost is a web development service specializing in the no-code tool "Webflow."
We maximize your website's customer acquisition power through three optimizations: design, marketing, and translation.

