How to Set Alt Text in Webflow

This time, we'll explain how to set Alt text in Webflow. Alt tags are a crucial element for SEO. If Alt text is not set correctly, even a site painstakingly created in Webflow might not rank high in SEO evaluations, so caution is advised.
From here, we will guide you through the steps to set Alt text.
Steps to Set Alt Text
1. Select the image
First, select the image you want to configure. For example, using the image below, you would select the Webflow logo image.

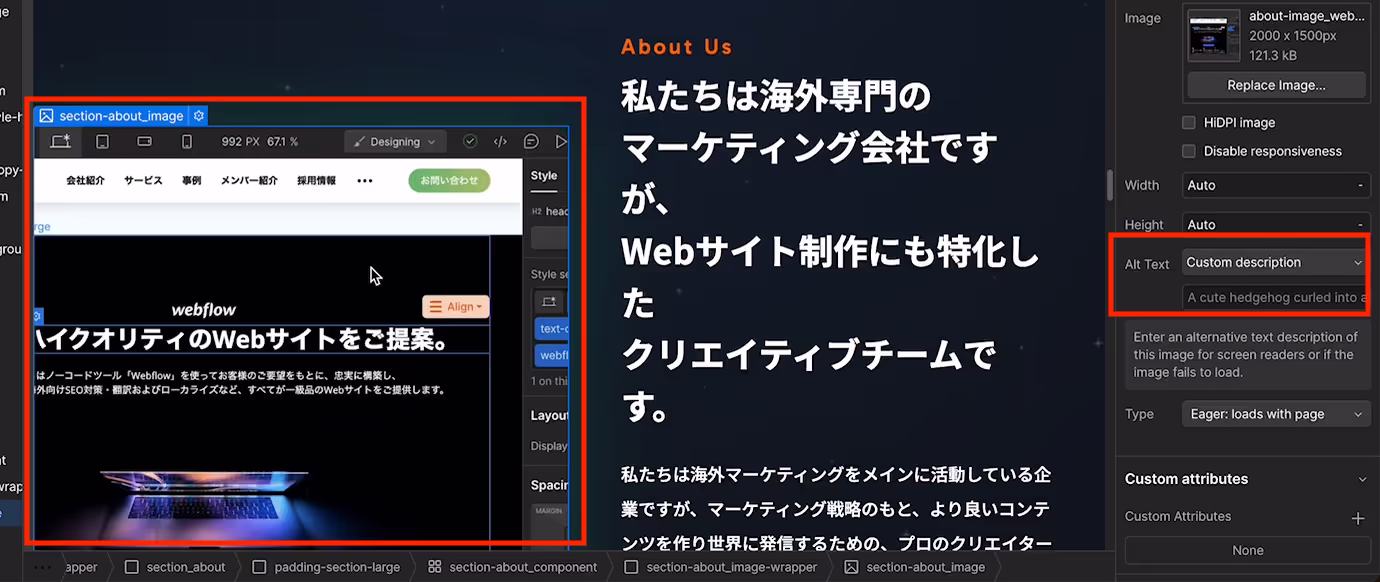
2. Open the right panel settings
With the image selected, open "Settings" in the right panel, and you will find an item called "Alt Text."

3. Display the Alt Text options
Clicking "Alt Text" will display
- Use alt text from asset
- Decorative
- Custom Description
the following three options.

4. Choose how to input Alt text
From the three options mentioned above, choose the appropriate method for entering Alt text. Below, we will explain the characteristics of each.
Use Alt Text from Asset
This method automatically applies the Alt text entered by clicking the gear icon from the image list in Assets after uploading an image. It is the most efficient and recommended method.


Decorative
This is used to indicate that an image is for decorative purposes and not for conveying information. Specifically, you select this option for images used as visual embellishments or design elements. Decorative images do not require an Alt tag and are ignored by assistive technologies like screen readers.

Custom Description
Selecting this option displays an input form below, allowing you to enter any Alt text. However, setting all images with Custom Description can be time-consuming, so we recommend entering Alt tags from the Assets panel and choosing "Use Alt Text from Asset."

If Alt Text is Not Set
If even one image does not have an Alt tag set, a red square icon will appear on the right. This indicates a warning that Alt text is not set. Since "Missing Alt Text" will be displayed,
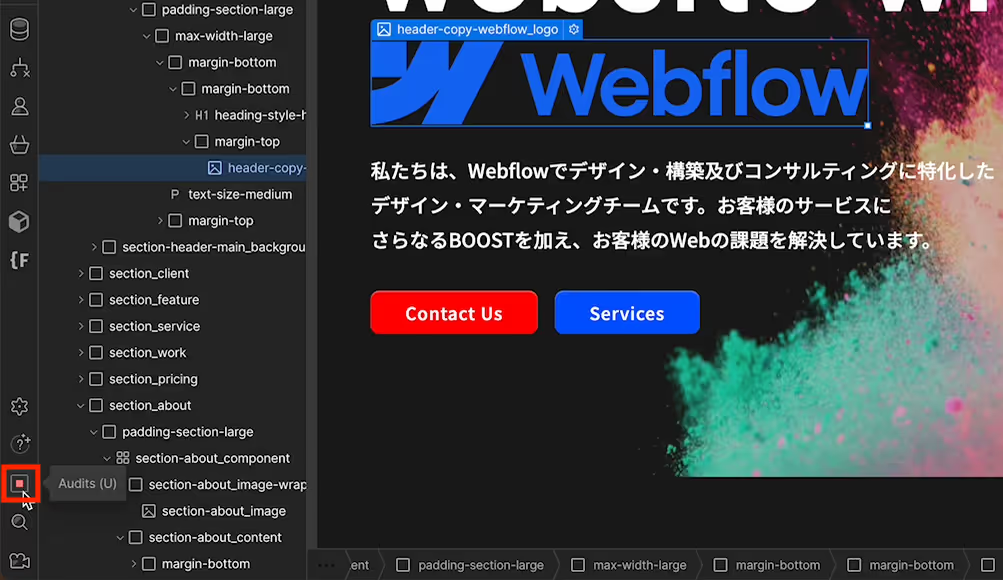

Clicking this icon will jump to the corresponding image, allowing for smooth Alt text correction.

Once the Alt text is set, the mark in the bottom left will change to a checkmark.

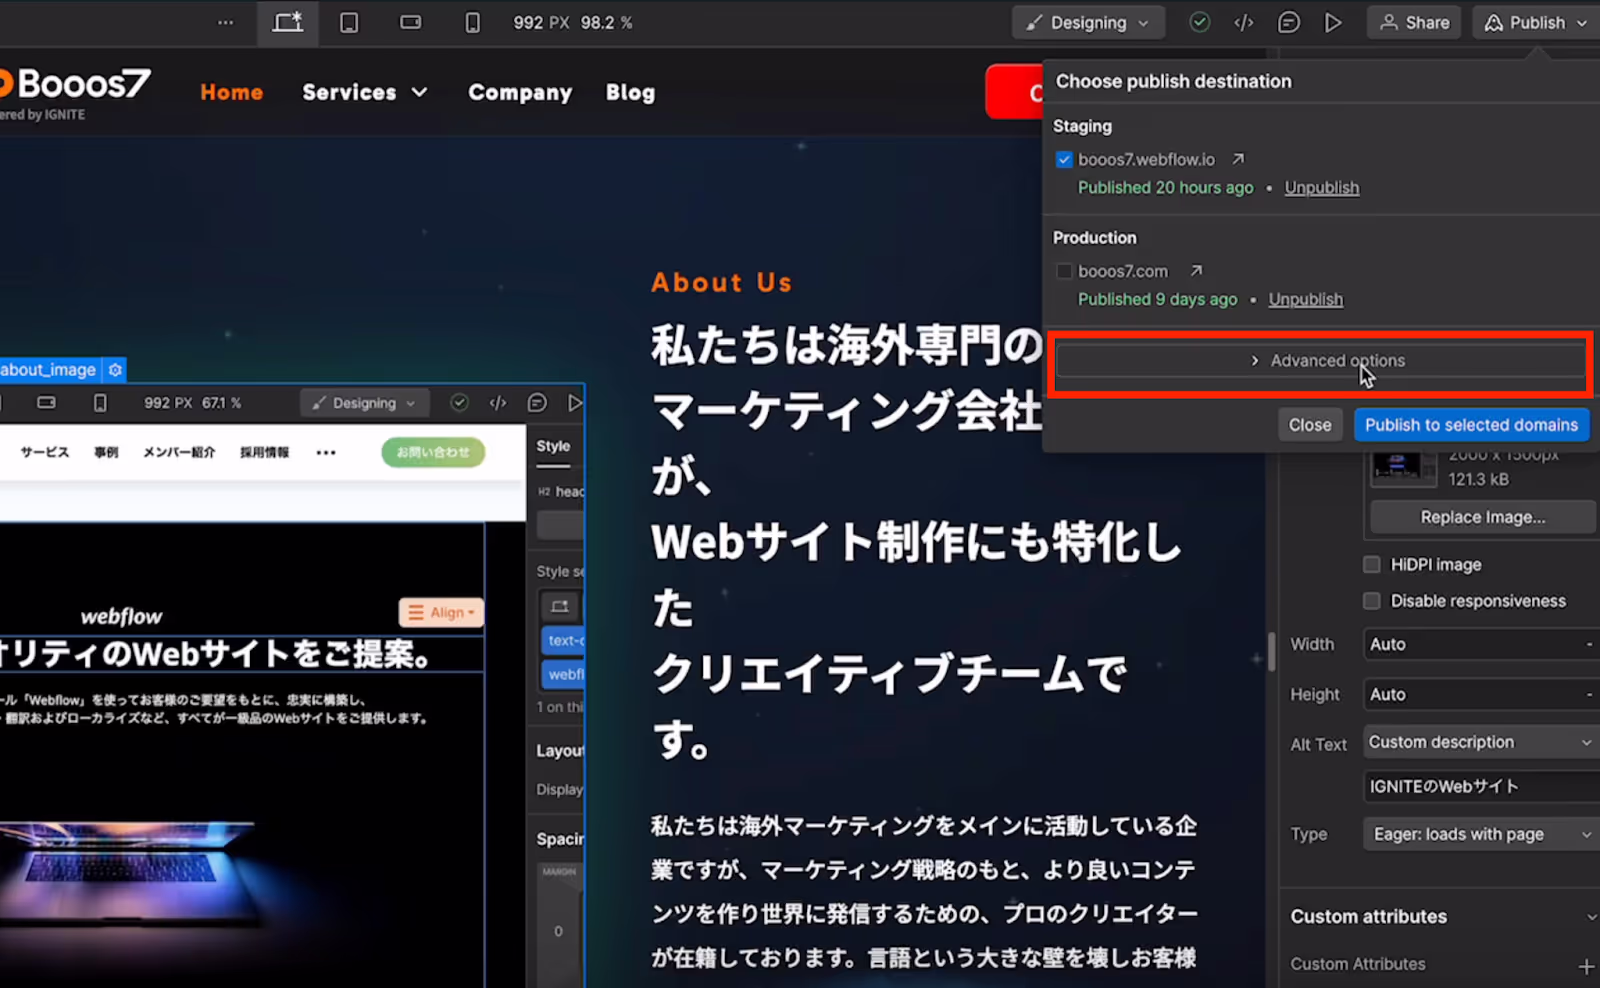
Furthermore, if Alt text is not set, a warning will also appear when publishing, helping to prevent oversight. The red-framed area below will indicate that Alt text is missing.
Always Set Alt Text Before Publishing
Efficiently setting Alt text in Webflow is crucial as part of SEO strategy. Properly configured Alt text helps search engines accurately understand your site's content, leading to improved search rankings. It also ensures users can understand the content even if images fail to load correctly.
Moreover, Webflow displays warnings for images without Alt text, preventing oversights before publishing. This helps maintain site quality, maximize SEO effectiveness, and enhance competitiveness. Always double-check Alt text settings before publishing to ensure your site goes live in optimal condition.
If you need assistance,Booos7feel free to contact us at Booos7. We provide support to help resolve your Webflow questions.
Booost is a web development service specializing in the no-code tool "Webflow."
We maximize your website's customer acquisition power through three optimizations: design, marketing, and translation.

