

How to reuse components on multiple sites with the Webflow shared library function

When operating multiple Webflow sites, there are always situations where you think “I want to use this button design on another site” or “I want to unify navigation components across all sites.” Until now, there was no choice but to recreate the same elements for each site or port them with copy and paste, and subsequent updates also required the trouble of individually modifying each site. The “shared library” feature, which was released on 2025/7/15, resolves these issues from the ground up. Components, variables, and assets can now be managed centrally across all sites within the workspace, making design system operations much more efficient.
What is a shared library and what's changing
A shared library is a function where design assets created on one site can be installed and used on other sites within the same workspace. There are 3 types of assets that can be shared: components (buttons, cards, navigation, etc.), variables (color tokens, typography settings, etc.), and assets (logo images, icons, etc.).
Until now, Webflow has basically been managed on a site-by-site basis, but with the advent of shared libraries, it is now possible to capture and manage the entire workspace as a single design system. If you want to change the brand color, simply update the variables on the original library site, share them, and they'll be reflected on all of your installed sites.Types of elements available in shared librariesIt is also being continuously expanded, and maintaining consistency across multiple sites and improving the efficiency of update work can be realized simultaneously.

[Image] Draft image: screenshot A screen showing a list of components and variables in Webflow Designer's new “Library” panel
Steps from sharing a library to installing
Share your library
First, open the library panel on the site where the design assets are based. The panel shows how many components, variables, and assets the site has. If you click the “Share with Workspace” button and complete the “Share Update” on the confirmation screen, you will be able to browse that library from other sites within the workspace.
Install on another site
When you open the library panel for the site you want to install, a list of libraries shared within the workspace is displayed. Simply select the library you want to use and click “Install Library”, and the components and variables contained in that library will be available within the site. Installed components can be placed on the canvas in the same way as regular components, and font settings etc. on the receiving site are automatically applied.

[Image] Draft image: screenshot screen of the operation procedure for installing a library from another site
Update propagation and caveats
The shared library update procedure involves several steps and is important to understand. Shared components cannot be edited directly on the installation site. You can change the text content, but if you want to change the component structure or images, you'll need to make edits on the original library site. After editing, execute “review update” → “share update” on the library panel of the original site, and apply the latest version by “review change” → “all update” on the installation side site. To componentscustom tooltipsIf you set it up, it will be easier for team members who use the library to intuitively understand how to use it. Sharing this update flow with the team in advance will lead to smooth operation.
Limitations and usage strategies for each plan
The shared library feature is available with all paid workspace plans, but the number of libraries you can share simultaneously depends on your plan. With the Core Growth Freelancer plan, you can share a single library, and with the Agency/Enterprise plan, you can share an unlimited number of times.
Even with the Core Growth plan, which has a limit of 1 library, the strategy of creating a dedicated library site and aggregating all common components is effective. If you combine generic components such as buttons, headers, footers, and cards, and brand color and font variables into one library site, you can deploy them to all other sites from there. If it is an Agency/Enterprise plan, an independent library can be created for each client brand, and a system for strictly managing brand guidelines can also be established.
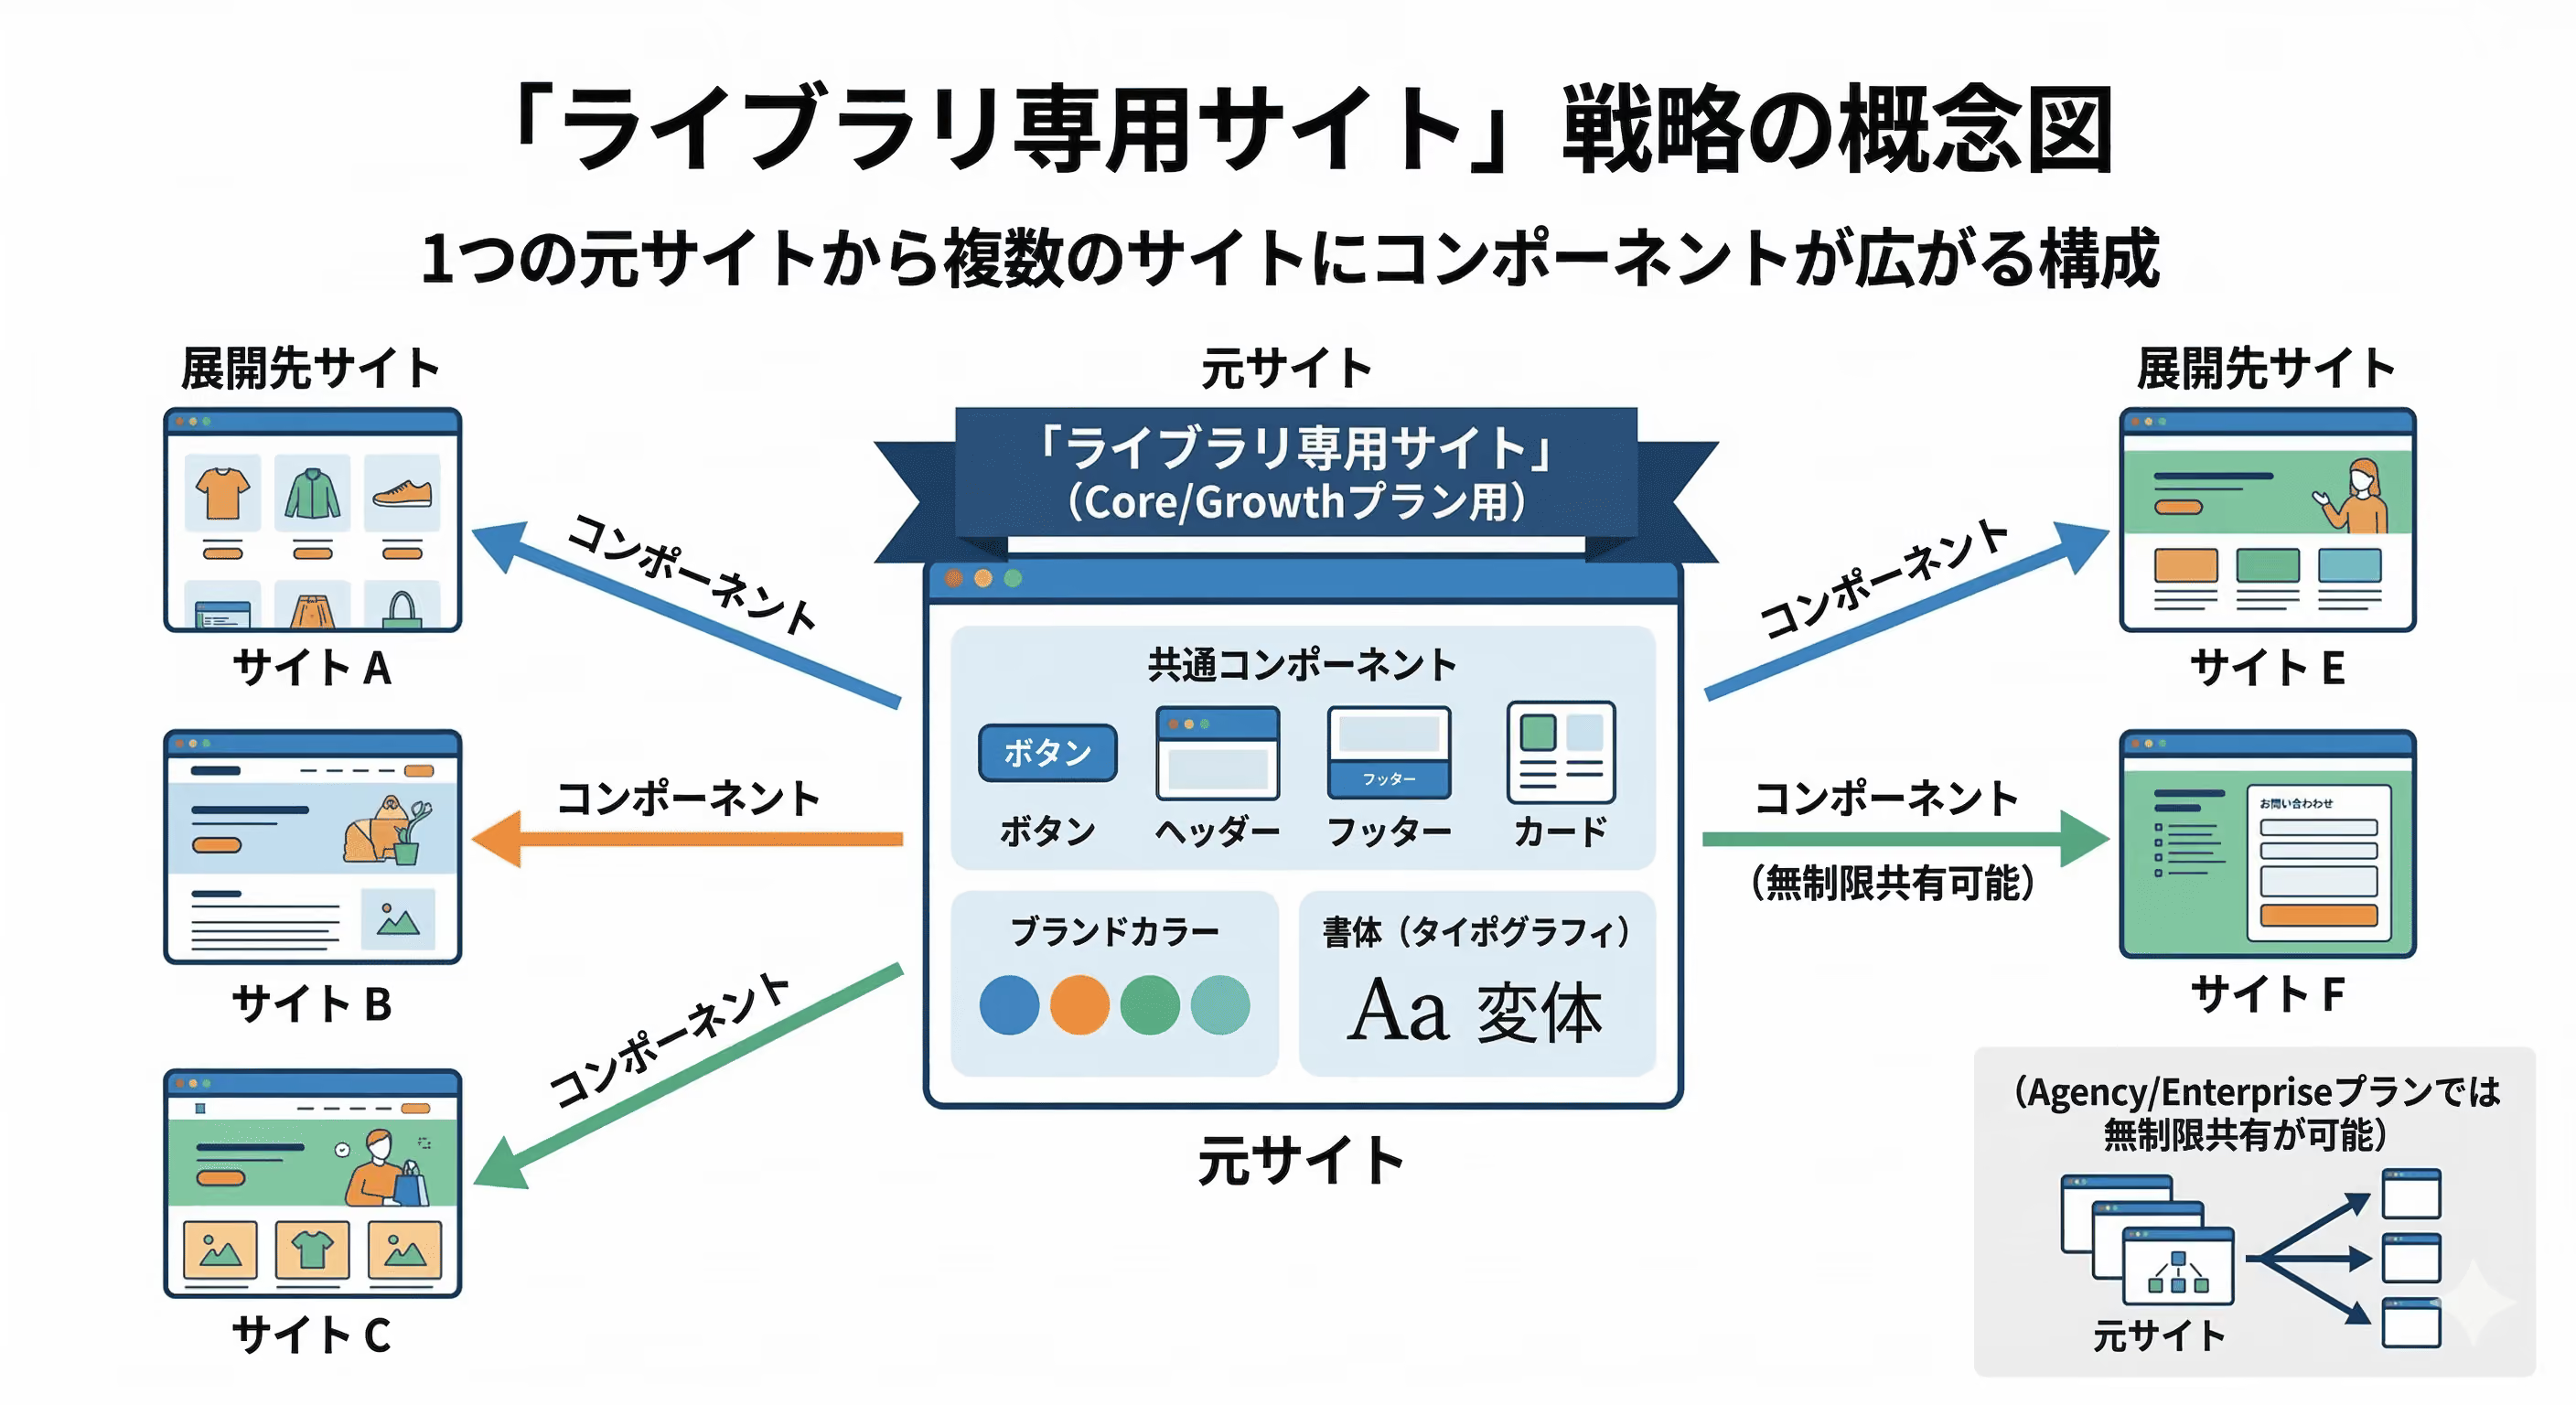
[Image] Draft image: Screenshot Conceptual diagram of the “library-only site” strategy. A configuration where components spread from one source site to multiple sites
summary
Webflow's shared library feature is a long-awaited update for teams running multiple sites. Since components, variables, and assets can now be managed across workspaces, the construction and operation of design systems can now be completed within Webflow. It takes some time and effort to get used to the initial update flow, but once operation is established, you can obtain a powerful system that can collectively reflect brand changes and common UI improvements across all sites. What are the components in the libraryOrganize with easy-to-understand namesBy doing so, team members can quickly find the elements they're looking for. We recommend that agencies and freelancers with multiple sites, as well as for projects where the number of sites is likely to increase in the future, to design an architecture that utilizes shared libraries from now on.
Booost is a web development service specializing in the no-code tool "Webflow."
We maximize your website's customer acquisition power through three optimizations: design, marketing, and translation.

